


Michael
Thankyou for your kind comments. A couple of years ago I took early retirement from my job of 30 years and set about building up a collection of these wonderful bikes of the 1960s. Unfortunately I am back at work again so progress has been slow. My 'project' is to fully restore a number of bikes concurrently and learn the differences as I go.
As an Engineer of 30 years standing I really enjoy 'getting into the heads' of the people who designed these things and marvel at how many different solutions they came up with for the same problem.
Just waiting for some some fork oil and a lump of aluminium to arrive so that I can make up a small spacer for the Girling lower chrome covers I have bought and get them filled up with the appropriate amount of oil.
When I am finished, I will re-work this bitty post into a tidy document with pictures of all of the tools and techniques used. I'm sure there will be better solutions out there for un-repairable shocks but this is my offering which I hope folks will get something out of.
Graham
dissasembly of rear shock covers
Last edited by G-Man on Sat Oct 28, 2017 2:04 am, edited 2 times in total.
'60 C77 '60 C72 '62 C72 Dream '63 CL72
'61 CB72 '64 CB77 '65 CB160 '66 Matchless 350 '67 CL77 '67 S90 '77 CB400F Just a quick re-cap on the Dream shocks which a couple of people were asking about.
Pretty much the same as the others except for one fortunate detail. As the Dream top mount has to be removed to extract the covers it means that once the damper retaining nut is removed, the seal can be replaced without further dismantling. As the damper rod is 9mm and the shock body 27.2mm internal diameter, the CB160 seal can be used. this is part number 91254-216-000. Physical dimensions 9 x 27.2 x 10 mm. Compressing the covers to release the top eye and spring..... 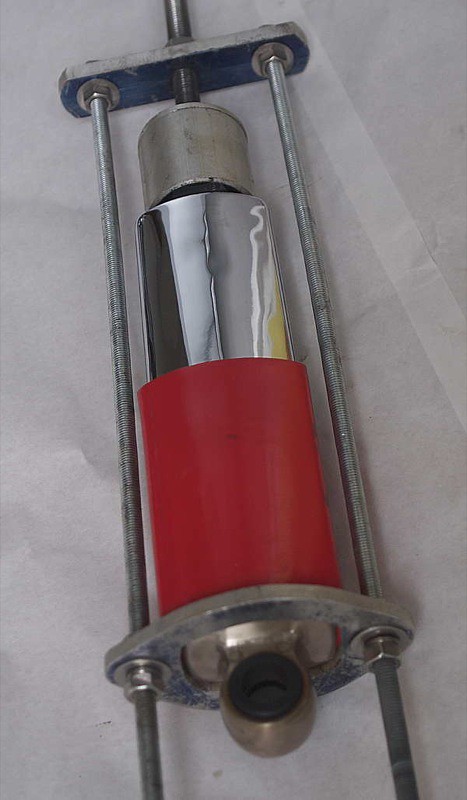 Shock Compressor 1 by graham.curtis, on Flickr Here is the slotted retainer. The punch marks have to be drilled or 'dremelled' out to release the retainer... 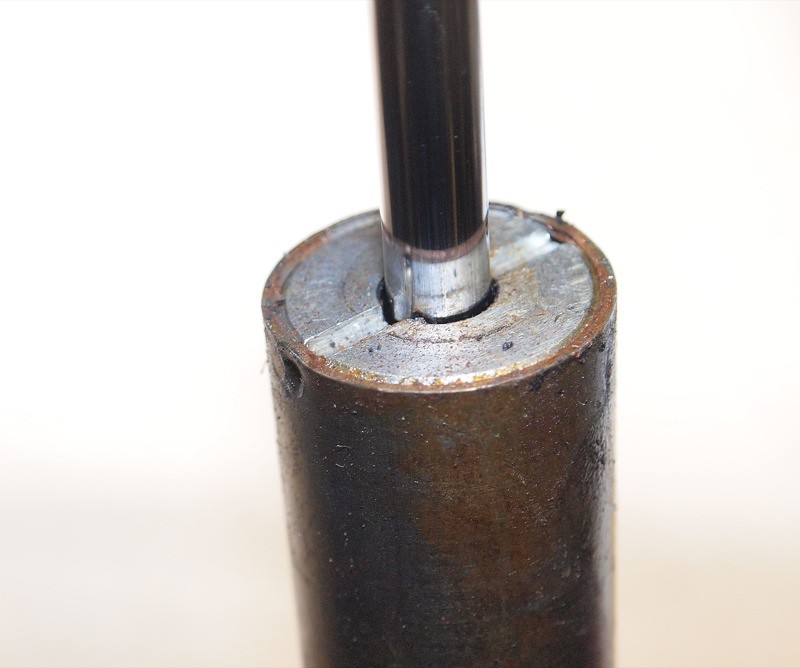 Dream - Damper Retaining Nut by graham.curtis, on Flickr This one was given a straight dent rather than a center pop so I had to grind it away with the Dremel. 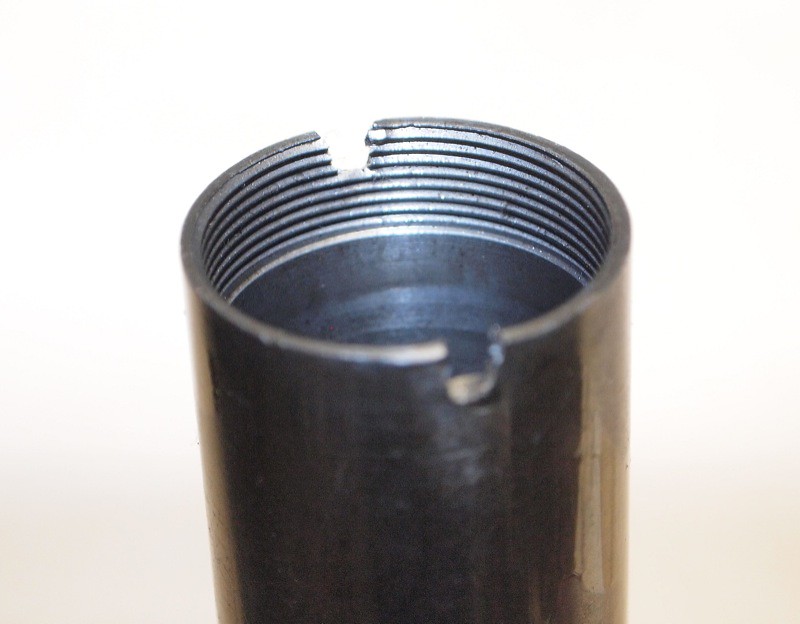 Dream - Damper Peening removed by graham.curtis, on Flickr Pull out the rod.... 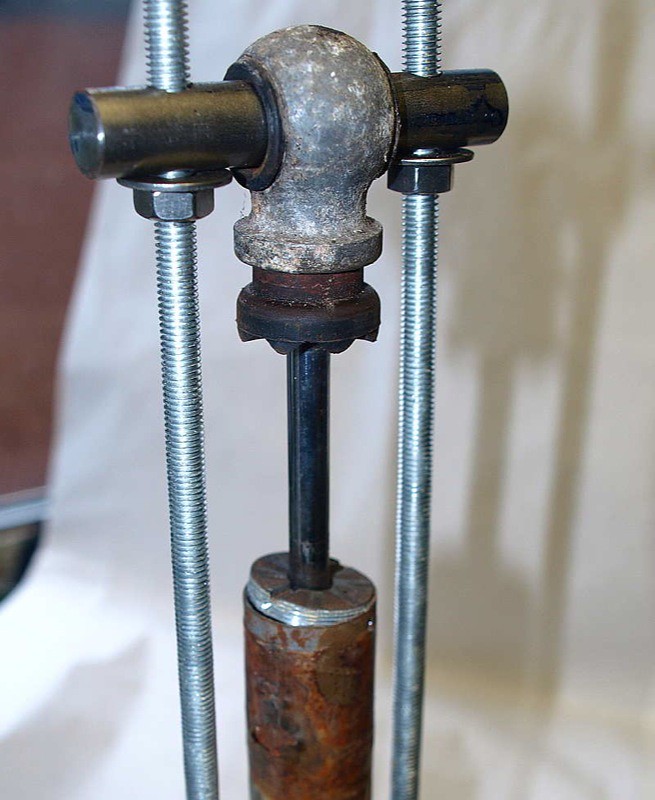 Exract Damper 1 by graham.curtis, on Flickr The seal just slides off, but if you are going to re-use the seal - don't forget to protect it from the sharp threads with some tape.... 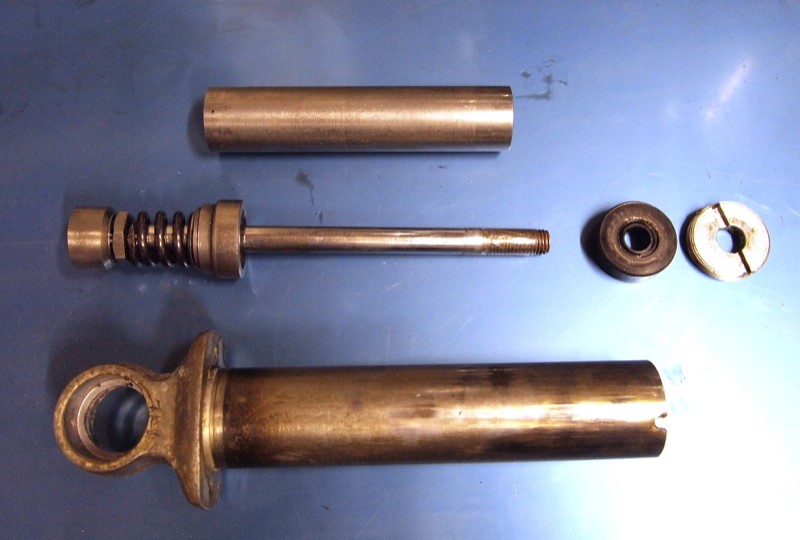 Dream - Damper Disasembled by graham.curtis, on Flickr I think I've covered almost all variations now....... G
Last edited by G-Man on Mon Jan 30, 2012 5:29 pm, edited 1 time in total.
'60 C77 '60 C72 '62 C72 Dream '63 CL72
'61 CB72 '64 CB77 '65 CB160 '66 Matchless 350 '67 CL77 '67 S90 '77 CB400F
Tom
The slot is, I think, about 3mm wide, so the tool I made is just a piece of 3mm plate with a hole drilled to clear the damper rod. The hole was sawn into a slot, then the ends were heated and bent sharply at right angles. 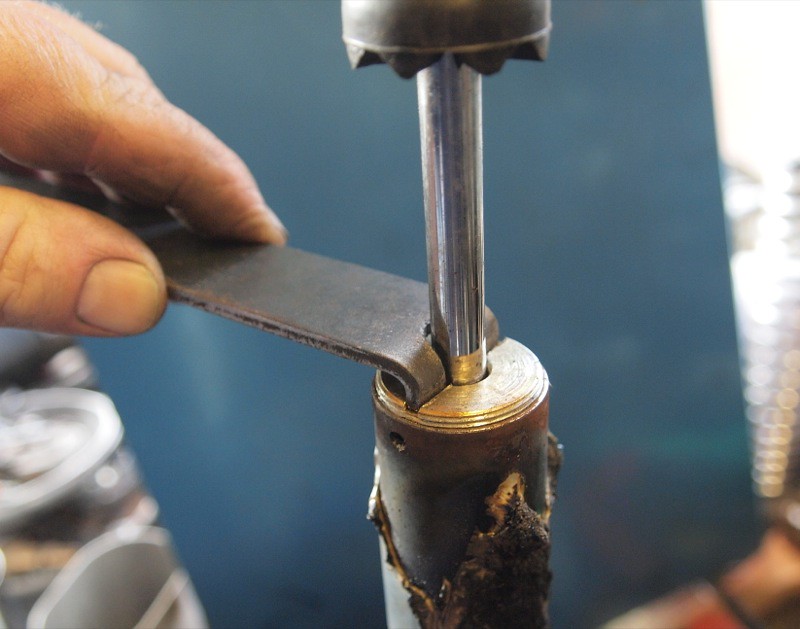 Retaining Nut tool by graham.curtis, on Flickr 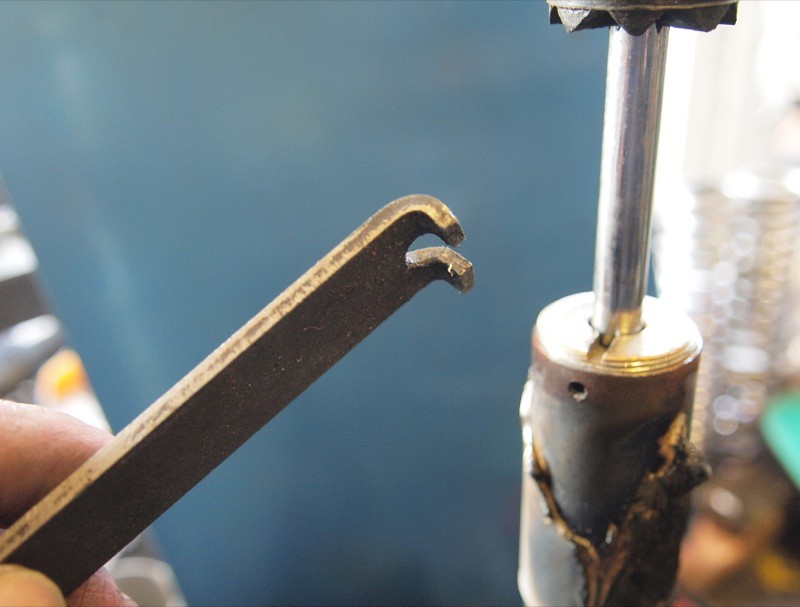 Retaining Nut tool detail by graham.curtis, on Flickr The retaining ring a lot easier to remove if you can drill or grind out the center pops that are used to lock the ring in place. G '60 C77 '60 C72 '62 C72 Dream '63 CL72
'61 CB72 '64 CB77 '65 CB160 '66 Matchless 350 '67 CL77 '67 S90 '77 CB400F A few more pictures to show progress so far. Here are three pairs of dampers all buttoned up with fresh shock oil, new seal and a new coat of chromium plate.
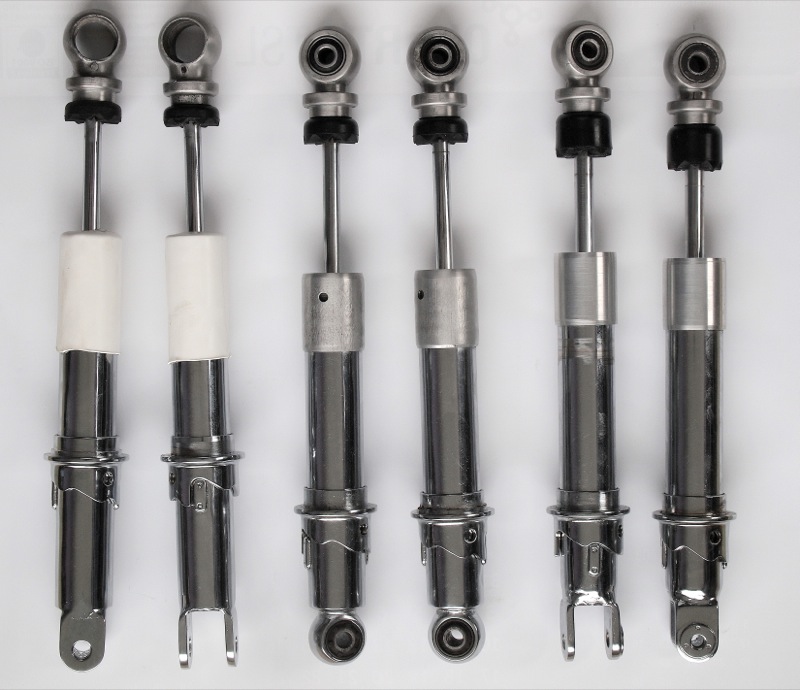 CB77-CL72-CL77 Dampers Reassembled by graham.curtis, on Flickr To finish off the CL77 shocks I had to locate some replacement chrome lower covers. All of the original ones I have didn't make it through the chroming process due to pits or other damage. I found some new lowers made for Girling (or Hagon) shocks on eBay but the hole in the bottom was too large for the Honda damper. Another trip to the lathe was needed to turn up some adapters for the covers but, once mounted, the new covers are a good match for the Honda ones. 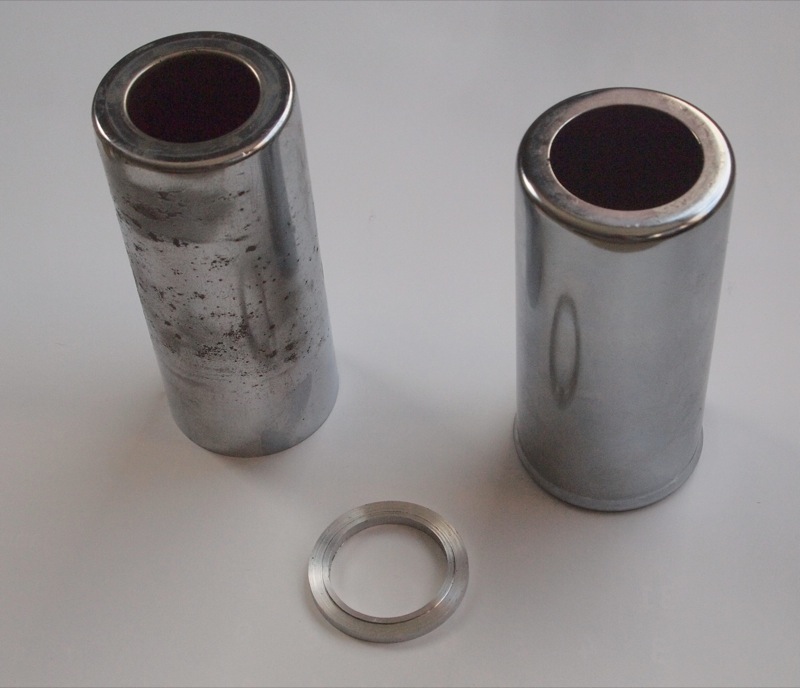 CL77 - Old cover - new cover by graham.curtis, on Flickr The adapter fits inside the chrome cover and just centres it on the preload ring so that the two covers do not rub. 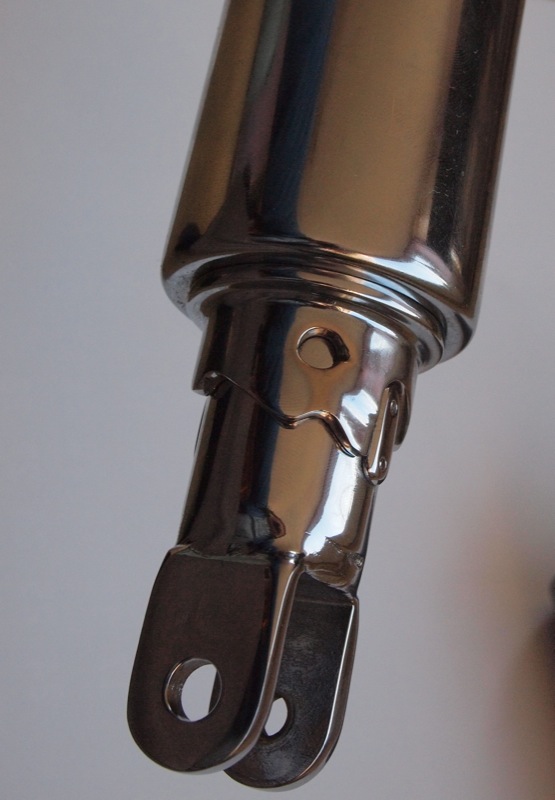 CL77 - Cover centered on adapter ring.jpg by graham.curtis, on Flickr Still need to get some paint on the top cover but that will have to wait for the good weather. 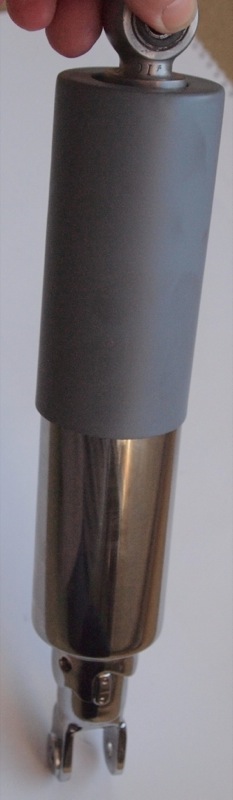 CL77 - Assembled - almost by graham.curtis, on Flickr Both my 'new' CL77 dampers have a good damping action and the oil is staying inside so I am pretty pleased. The CB77 dampers shown above have had a similar treatment with a 'seal adapter' but the CL72 shocks were treated to NOS seals which are still available. Take care G '60 C77 '60 C72 '62 C72 Dream '63 CL72
'61 CB72 '64 CB77 '65 CB160 '66 Matchless 350 '67 CL77 '67 S90 '77 CB400F
G’day G-Man
Outstanding work and write-up. I can see that Engineering background and a very good lathe capability helps you out - I'm very envious! Do you have any other metal working machines in your collection? I'm also a qualified Mechanical Engineer with a Fitting and Turning trade backgound - but I'd just love to have your capability and machines. I'm at the stage at looking at rebuilding a couple of pairs of C72 Dream shocks that I have and just wanted to ask you about your Dream damper rebuild experience please if you don't mind. My shocks in their current condition don't seem to be double-acting is that correct and normal? They only provide damping in the rebound direction. One shock I have is leaking slightly on the shaft seal. You mention that the 9 x 27.2 x 10 mm seal suits; is that correct? Your write-up seems to suggest that replacing these isn’t too much of a drama once the damper is disassembled. Are there any other seals within the damper that need replacing or is it just a matter of disassembly (as you detailed), cleaning up, replacing the shaft seal, refilling with oil and reassembling? Thanks again for sharing your experience and knowledge – I know it assists a lot of people just like me. Thanks and regards Thanks.
Regards Muddy '64 C72 '63 C72 Hi Muddy
Great to hear from you. Thanks for the kind comments. My machines are definitely in the hobbyist category. The lathe is almost as old as me and was made just up the road from me by Myford ltd.. Unfortunately they went bust last year. I have a cheap chines milling machine which is OK but a bit flimsy. After only 30 years as an engineer, I am still learning..... There is only one seal in the Dream shock and yes, it is the 27.2 x 9 x 10 version that is available on eBay. 91254-216-000 from memory. Yes most Honda shocks have very weak bump damping and stronger rebound damping - that is normal. You need to be careful when you pull out the damper body. The seal is a tight fit and there is a spring underneath. My 'puller' pulls it out in a controlled way so that you can decant the oil and measure the quantity. I had been using 15wt oil to give a slightly better damping action. The Dream damper rod doesn't need to be dismantled fully as the seal can be pulled off the top of the rod. My Australia trip has been re-scheduled. I'm due in Sydney on 17th then up to Queensland on the Monday. It's all work, unfortunately - not much time for play. I'll put a couple of damper seals I'm my pocket in case you have trouble finding them :-) G
Last edited by G-Man on Sat Oct 28, 2017 2:07 am, edited 1 time in total.
'60 C77 '60 C72 '62 C72 Dream '63 CL72
'61 CB72 '64 CB77 '65 CB160 '66 Matchless 350 '67 CL77 '67 S90 '77 CB400F
| |||||||||||||||||||||||||||||||||||||||||||||||||||||||||||||||||||||
