It is not straightforward, but before getting into the detail, can the C brake be improved without such a radical change? A common improvement made to old British bikes of the era is to fit a longer front brake arm. This makes more leverage which gives a stronger load on the brake shoes and/or a lighter pull on the lever. It is possible to fit a brake arm about 20mm longer than standard, (although not easy to find one with a 13mm spline) and with careful adjustment works just fine. More leverage means more travel at the brake lever so the brake would likely feel softer if you are used to the standard set up.
Another tweek is to ensure the brake shoes are the optimum fit to the brake drum. Of course a brake drum that is the correct diameter, perfectly round and with a clean surface is the best starting point but with old bikes you may not have much option here. There are professional people who will skim the brake drum in the built up wheel and machine the brake shoes to fit, it used to be a common practise with drum brakes on cars but nowadays not so easy to find the service.
However the brake shoes can fitted to the drum by manually arching them. There are one or two good videos on the interweb that explains this and are worth looking up. Basically abrasive paper is fixed around the inside of the brake drum, (self adhesive sandpaper is apparently available if you search for it) and then each brake shoe is individually held inside the brake drum and rubbed against the abrasive to remove any glaze on the shoe and to remove high spots so the brake shoe surface exactly matches the drum. If doing this don’t breath in the dust!
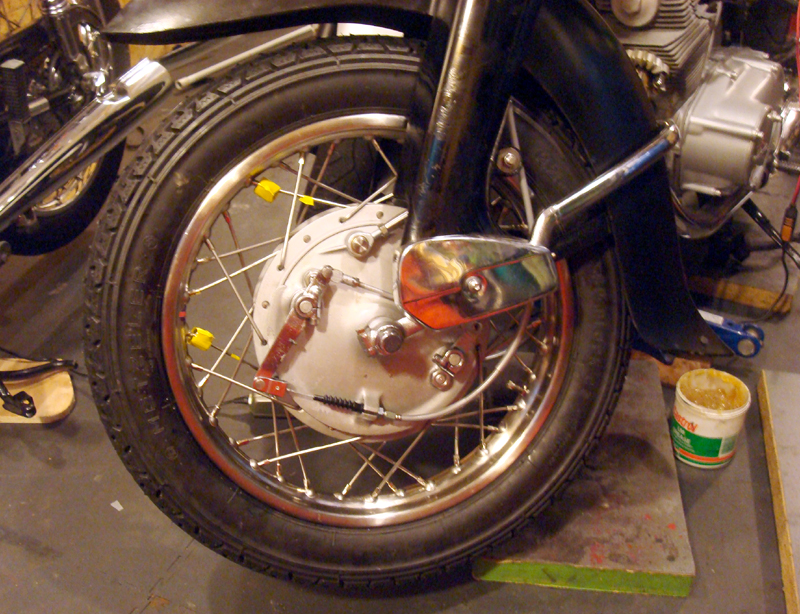
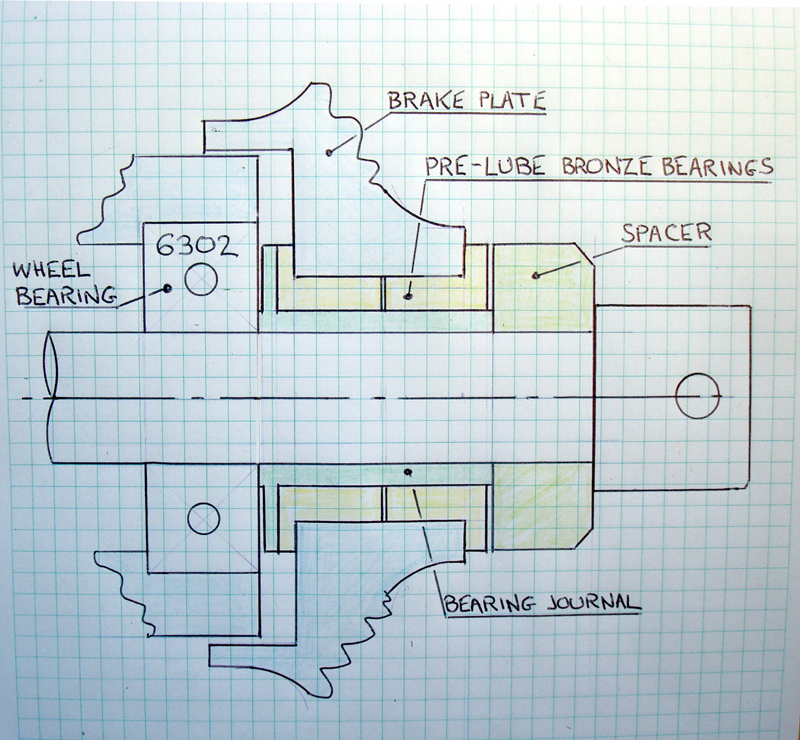
I have adapted a CB front brake to fit my CA77 but it does need some machining and of course the 18” CB rim needs to be replaced by the 16” of the C bike. The main difficulty lies with the different suspension systems. The CB has telescopic forks and the brake plate is effectively fixed to one fork leg and moves with it. On the other hand the leading link suspension of the C must allow the brake plate to rotate a little as the wheel moves along an arc from the fork pivot, It is technically called a 4 bar linkage. So the crucial bit of the conversion is to change the fixed brake plate of the CB into one that will twist with the suspension movement. The C front brake has a plain bearing, oil seals and a grease nipple to allow the movement so how replicate this with the CB brake plate?
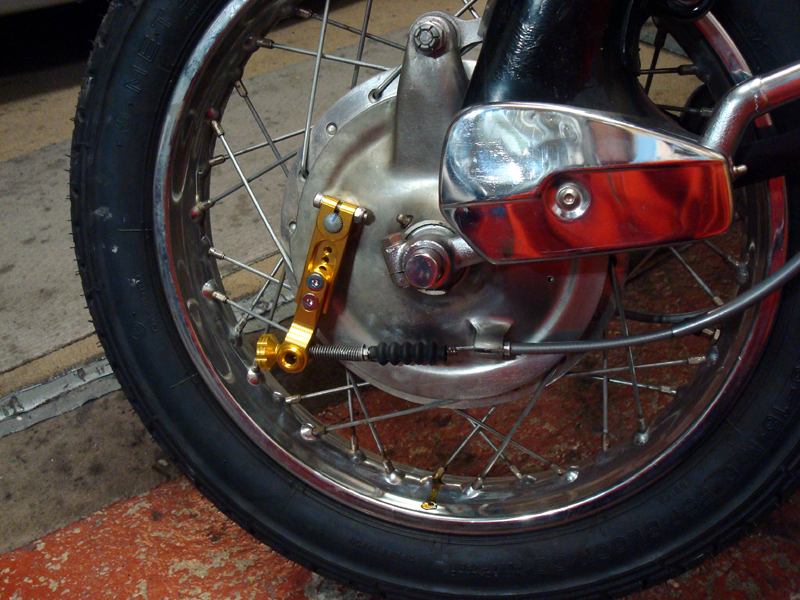
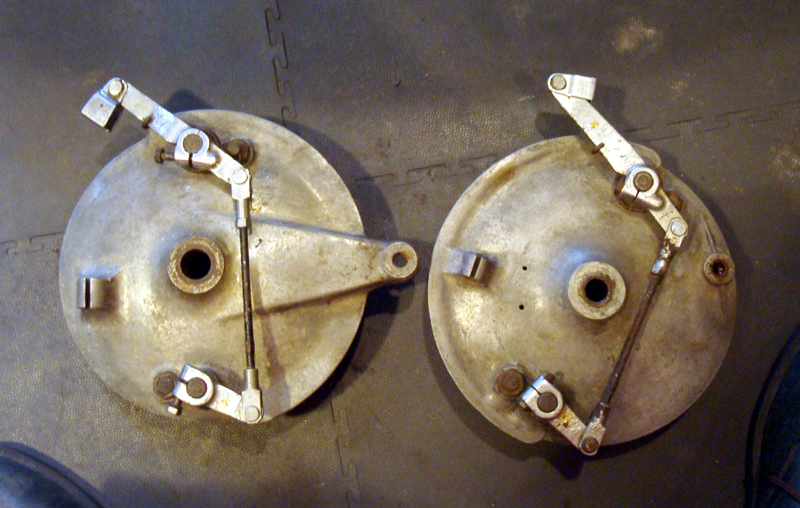
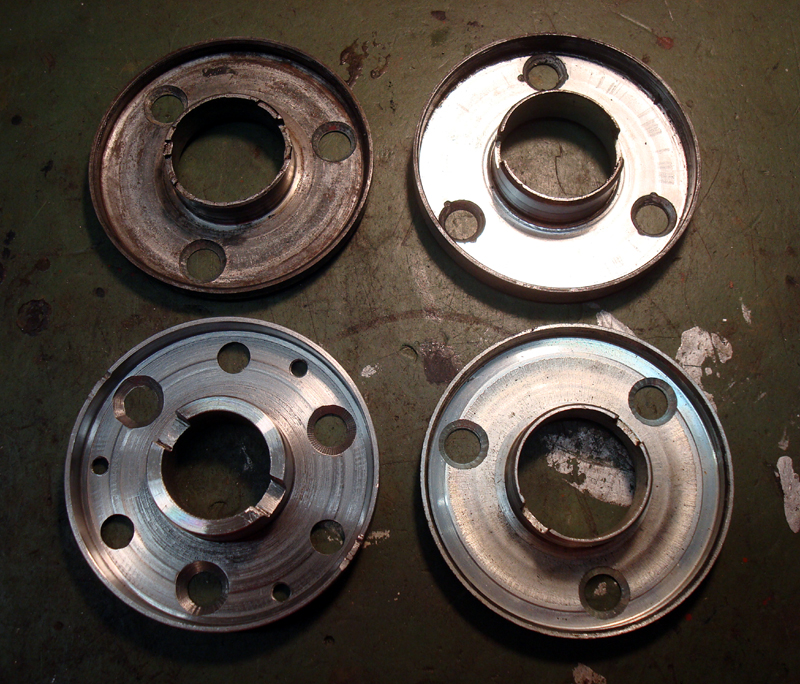
At first glance the rear wheel brake plate looks to be a contender as it also is a 200mm 2LS and has a similar looking protruding brake anchor point as the C. However there is a snag which rules it out as the angular position of the brake connecting rod relative to the brake anchor point causes the rod to foul the fork leg. Fortunately the front CB brake plate has the respective holes in better positions. This is easier to see by checking the comparison photo of the two brake plates. It can also be seen that the radial position of the brake plate anchor points is different, the C is at 130mm radius and the CB only at 90mm radius. After doing the sums it looks like this will not be a problem.
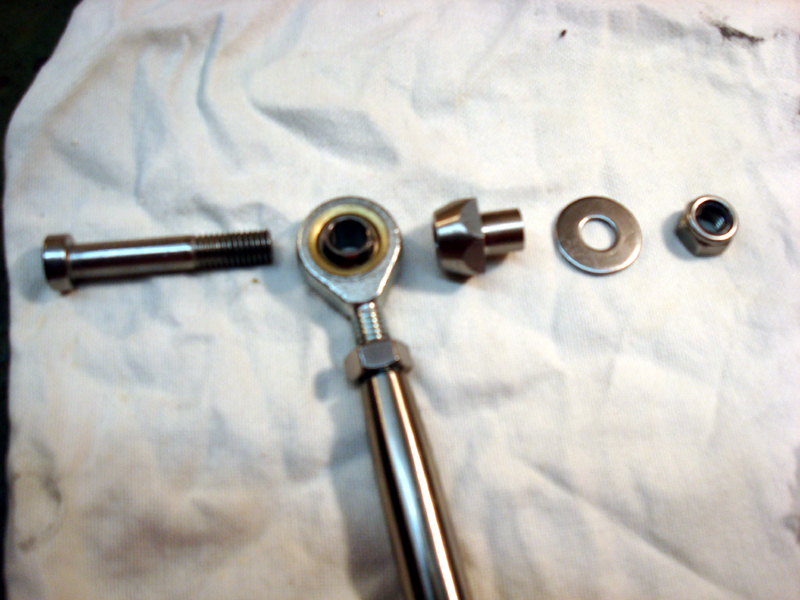
However, (again) the CB brake torque arm is designed to be fixed and in the new configuration it must move in a similar manner as the C torque arm with it’s rubber bushes. To overcome this a connecting rod with rose joints does the trick and also will accommodate some small misalignment between anchor point and the brake plate.
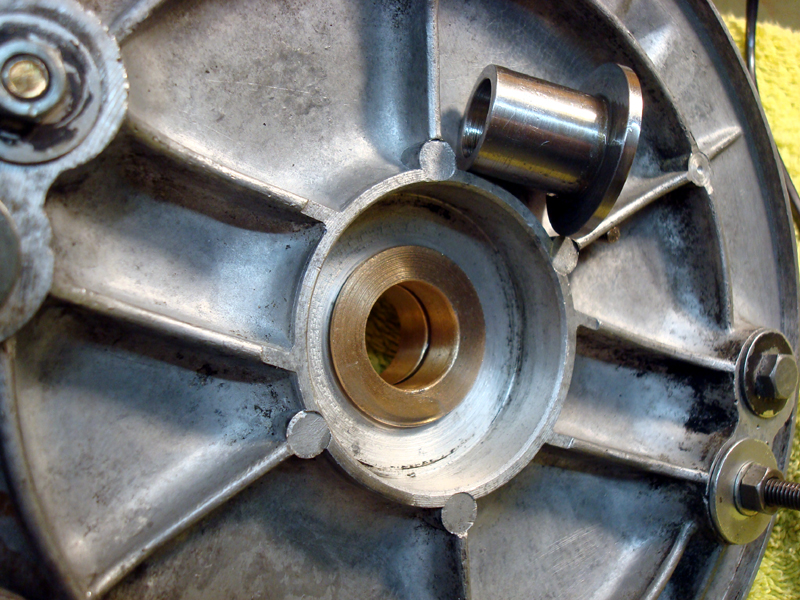
The bearings of the C brake are grease lubricated and have independent oil seals. There is minimum space with the CB brake plate so plain bearings made from pre lubricated bronze have been used with only the bare minimum of grease just to stop the steel bearing face rusting, (although some fretting corrosion is inevitable). Minimum grease so as not to contaminate the brake shoes.
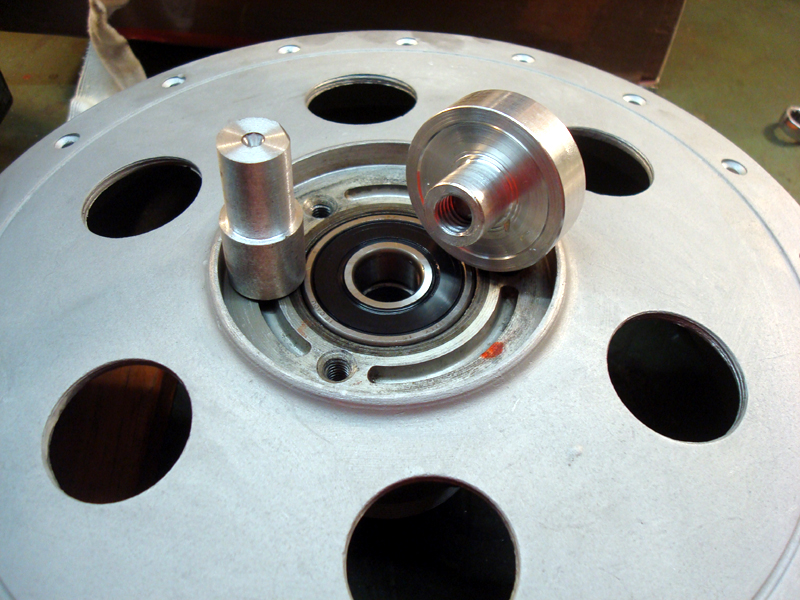
To make the bearings the brake plate was first bored through 27mm. This removed the small boss on the inside of the brake plate. This boss measures a snip over 4mm (an important measurement). Flanged bronze bearings (20mm bore) were machined to be a sliding fit in the brake plate, flanges out and not quite meeting in the middle. A new steel spacer flanged at one end 20mm diameter to slide inside the bronze bearings with a 15mm bore to accept the through axle. The steel spacer has to allow the wheel bearings and all to be clamped by the wheel nut, with a flange width to take up the 4mm lost in the first boring operation and to be a face for the inner bronze bearing. It has to be then slightly longer than the bronze bearings, only maybe 0.1 mm to allow the brake plate to rotate freely/ To finish off a plain steel spacer was made up fill the remaining gap between the new spacer and the brake pivot arms. Refer to the sketch, it’s not as complicated as it sounds.
One aspect which worked out fine was the position of the wheel rim and tyre between the fork legs. It only needed the spacer at the brake plate end to position the wheel dead centre.
I believe the speedo drive gear is different between the C and CB so the C drive was used. Unfortunately the C bearing retainer, (the bit that drives the speedo gearbox) would not fit the CB hub, the CB bearing retainer was not compatible with the C gearbox and was damaged anyway, a new C bearing retainer turned out to be the same design as the CB, (wrong part sent) so a bespoke item was hacked out of a lump of steel.
New wheel bearings were fitted, following the way of the original bearings the inner seals were removed and the bearings were packed with grease. It is generally not a good idea to put too much grease in a ball bearing but as one side of each original bearing was open then any excess grease would not be trapped in the bearing. A bearing fitting tool was fashioned to press in the bearings and to ensure the bearing spacer was aligned a simple guide aligned the spacer with the first bearing as the second bearing was fitted. As usual with fitting bearings the bearing itself came from the freezer and the hub was heated using a hot air gun. The first bearing dropped easily into place as did the second, but too easily as it happened as the second bearing pushed against the spacer and displaced the first bearing, but it was easily repositioned, something to note when doing this job.
The CB and C front brake cables are quite different but a new, long series CB cable works fine. It’s a shame the CB cable does not have the metal tube elbow near the handlebar brake lever but it works which is the main thing.
The brake was set up with the tie rod between the two cams set at exactly the same distance as the cam spacing. If it is any different then the two shoes will not work exactly together, this seems to be often misunderstood but I’m not going into that discussion here.
The last little change was to drill the brake arm where the brake cable connects and fit a split pin to prevent the cable slipping out. Later Hondas use this and it is easy to retrofit.
And is the new brake worth the effort? Well on a squally November day it is perhaps not the best day for a road test but I’m quietly optimistic.