


Just finished painting my bike and the only flaws were places where I did not sand bondo filler enough before starting. Had to redo those.
I sandblasted everything first.
Then prime and sand.
Next three coats two weeks apart and between each I wet sand 1200 grit.
First coat is thin, last coat if fairly heavy.
No further sanding after top coat, no clear coating, and I am happy.
I used Rustoleum high gloss enamel and bang for the buck is very high.
DIY Painting Procedure
Just finished painting my bike and the only flaws were Bondo filler not sanded enough. Had to redo those. I used a HVLP gun.
I sandblasted everything first. Then prime and sand. Three coats with two weeks between and wet sanded 1200 grit. No further sanding after top coat and no clear coating, and I am happy. I used Rustoleum high gloss enamel and bang for the buck is very high. This is my CB77 tank which I painted in my backyard using 'clear over base' paint from my local auto paint stockist.
I use small HVLP guns, start with an etch primer, then filler primer to cover the blemishes. I wet sand between coats then several coats of clear on top. The clear has not been sanded as it turned out nice without. 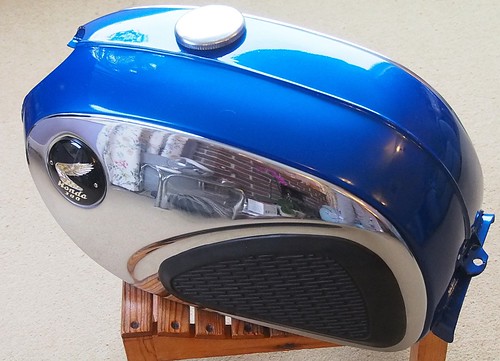 CB77 Tank 1 by graham.curtis, on Flickr And some 1962 Dream parts using the same process but with cellulose. 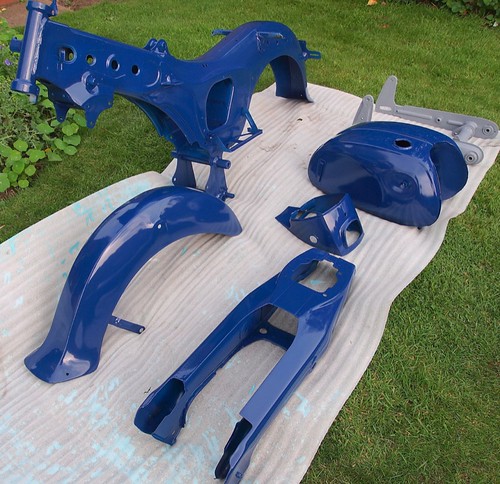 C72 Parts - painted by graham.curtis, on Flickr Painting a bike is great fun as it requires only patience to get a good result. I find the process quite therapeutic. No need to rush on a 50 year old bike...... :-) G '60 C77 '60 C72 '62 C72 Dream '63 CL72
'61 CB72 '64 CB77 '65 CB160 '66 Matchless 350 '67 CL77 '67 S90 '77 CB400F
Ditto, Beautiful work.Very nice work indeed! I was thinking of going over my rattle can work with the clear process suggested earlier but I went with gloss black. Might wait till it gets worn now and start over with blue.
| |||||||||||||||||||||||||||||||||||||||||||||||||||||||||||||||||||||
