honda305 Home honda305 Auctions honda305 Gallery honda305 Forum


honda305.com Forum

Login
□ Search
□ FAQ 
□ 
Vintage Honda Owners,
Restorers, Riders and
Admirers

1961 CB72 Project

Want to keep a Restoration Log? Post it here! You can include photos. Suggested format: One Restoration per Thread; then keep adding your updates to the same thread...
User avatar
G-Man
honda305.com Member
Posts: 5678
Joined: Wed Mar 25, 2009 5:17 pm
Location: Derby, UK
Contact:

Post by G-Man » Wed Feb 25, 2015 3:20 am

Curiosity got the better of me on the basis that my crank looked quite horrible from the outside with rust on the webs and the end shafts. I have a small 10 ton press and decided that, with other spares available, it would be educational to look at what tooling I needed to strip and inspect a crank myself. I have had some good advice from Tim, Jerry and Dave so I was, at least, ready for some of the pitfalls.

I mounted the crank between centres in my lathe and took dial gauge readings from the wheels and shafts. It should really be done with the crank centre bearings sitting on Vee-blocks but I wanted to take a skim off the rusty crank wheels so that I could get a good reading on the dial gauge.


Image

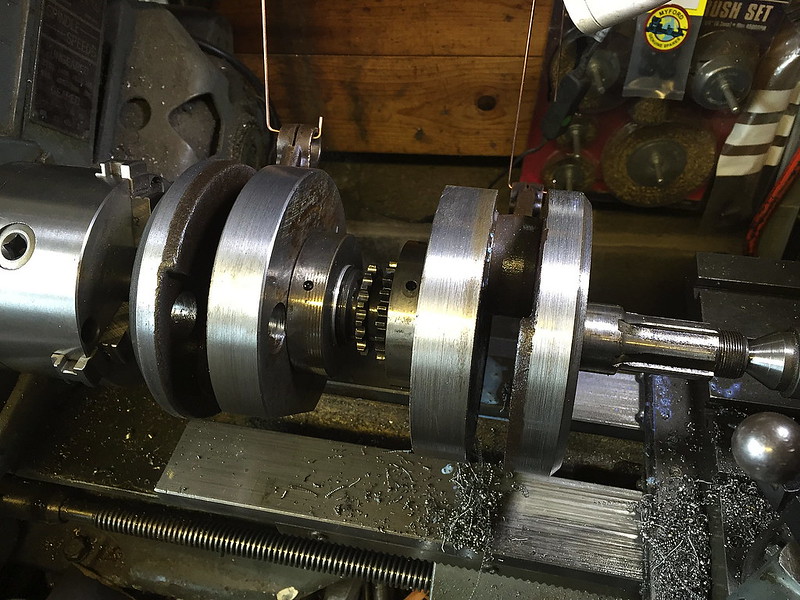
I measured all of the spacings between wheels so that I could refer tho this when putting things back to gather.

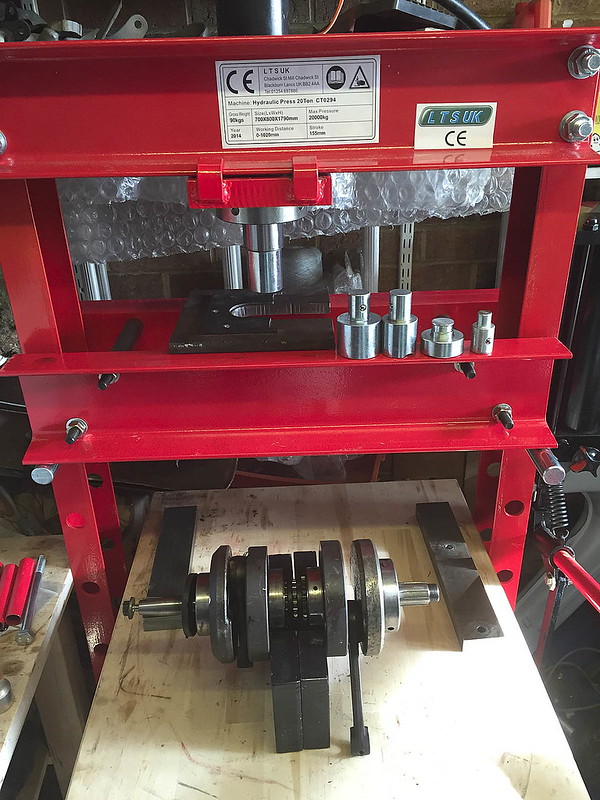
Then I loaded the crank into a fixture I had made to support the outer flywheels and put that in my little press.

Image

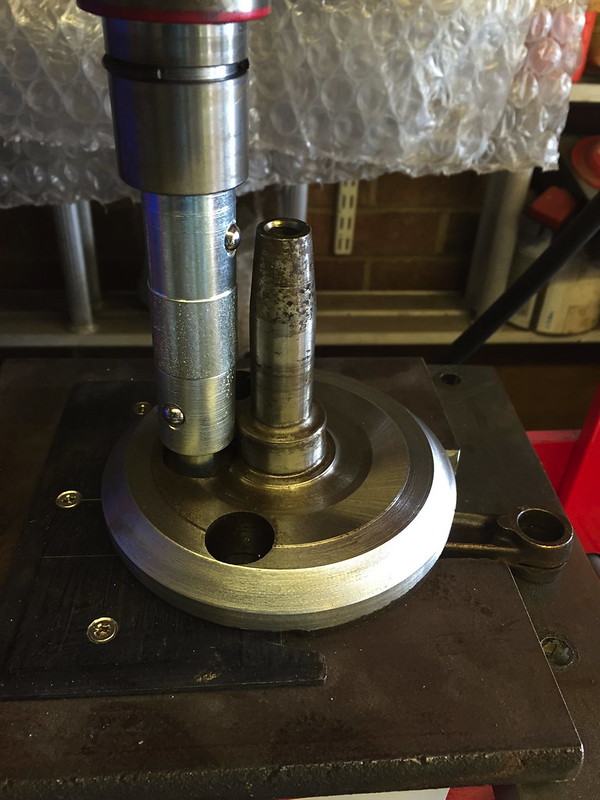
I pressed off the alternator side first and this gave way at about 4-5 tons on the press. It goes with a nice loud 'crack' when it gives away but pushed out steadily after that.

The other side got to about 8-9 tons before it went but it did go.

Image

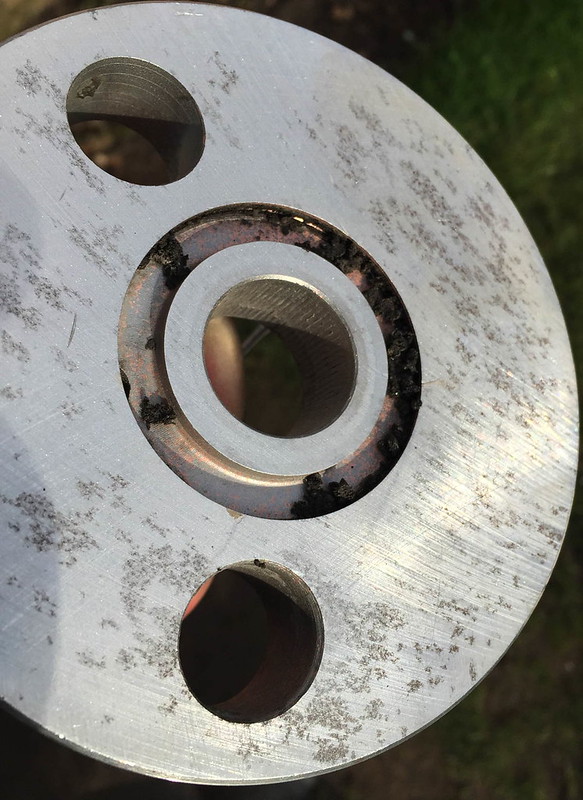
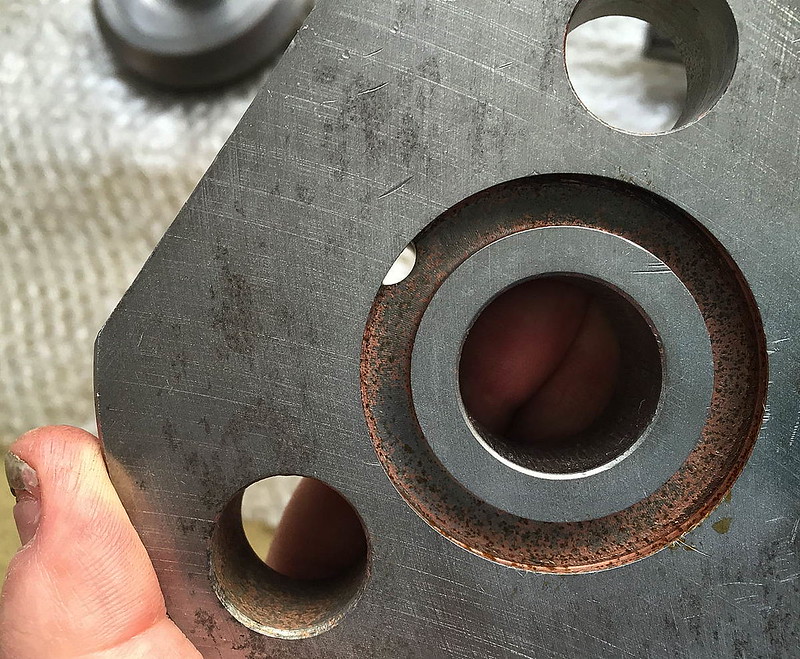
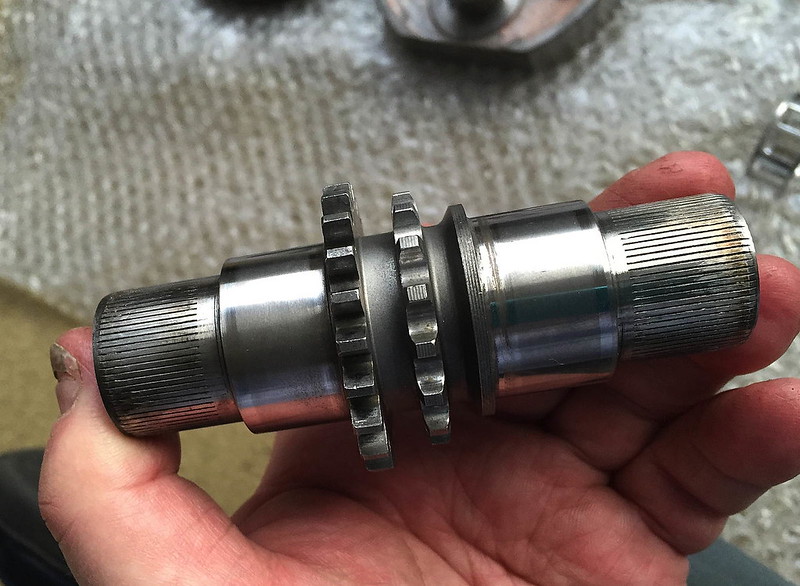
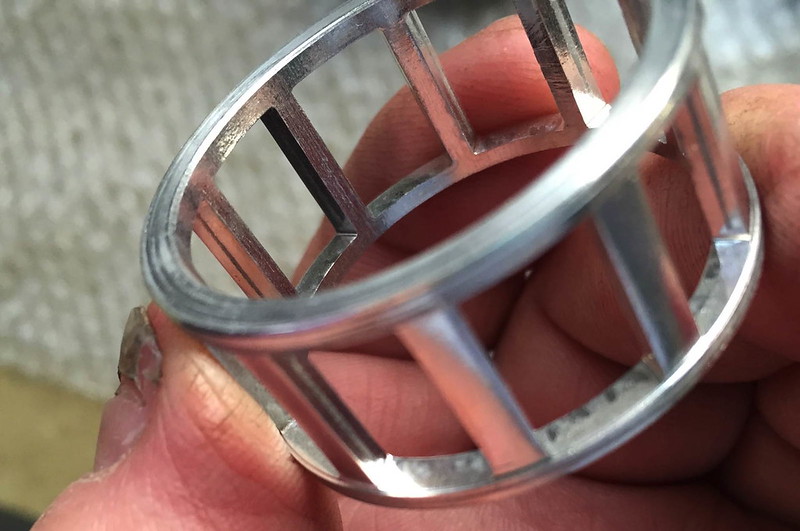
The inside of the centre wheels looked nasty but the big-end pins looked pretty decent once the rod and cage were gently pulled away.

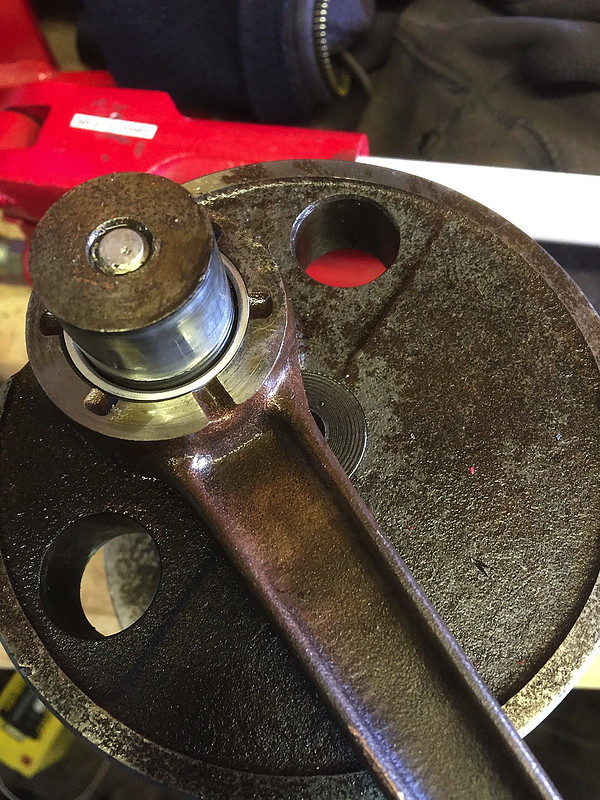
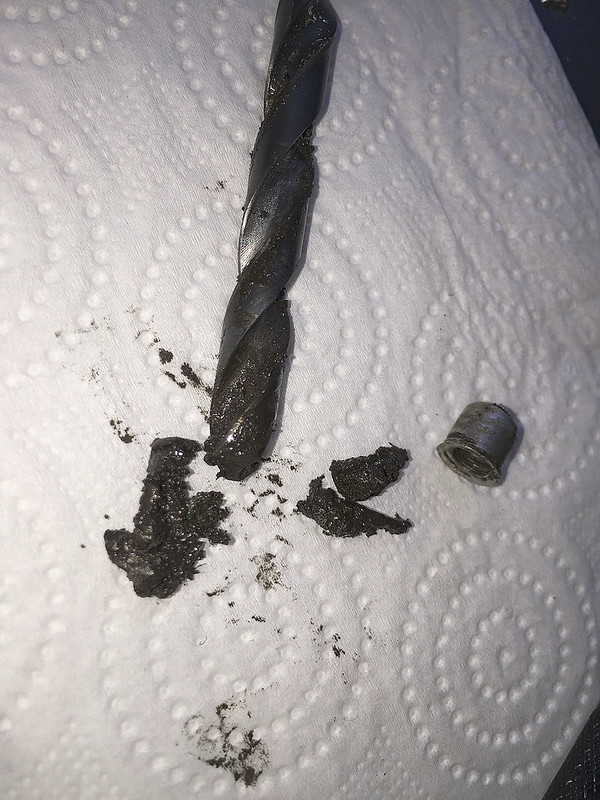
Tim encouraged me to pull out the big end oilway blanking plugs and I did this by drilling and tapping M6 then making a little extractor with an M6 bolt and a little spacer.

Image

When I put an M8 drill in there I could immediately feel the dirt in the hole.

Image

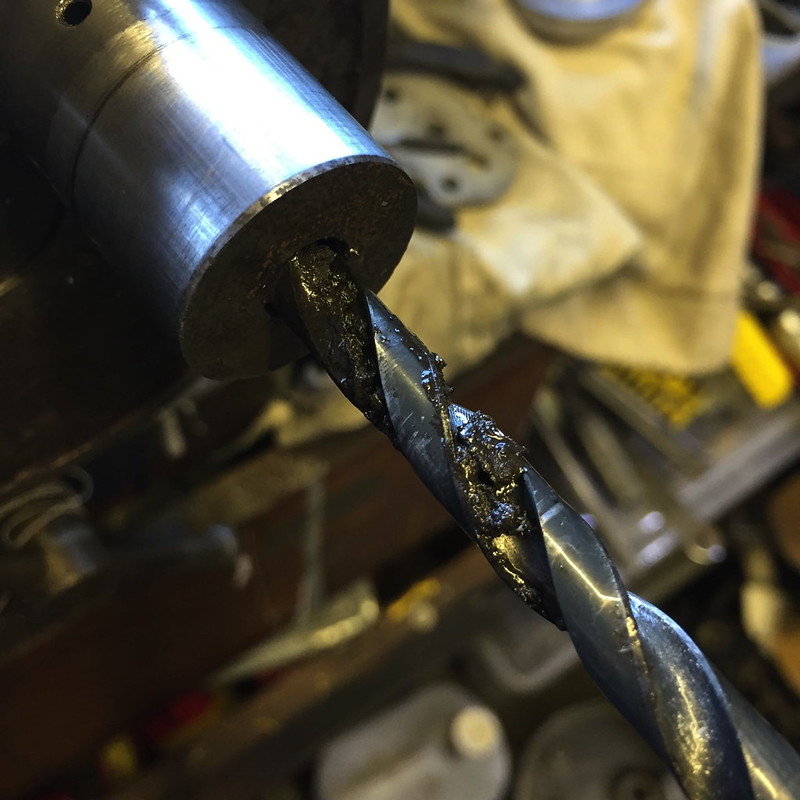
The crank pin runs at a larger radius than the oil filter so this is where dirt goes before it gets to the oil filter. Not a great place to store dirt in an engine......

Image

When I tried to push out the centre pin, I discovered that my 10T press wasn't man enough. At 10T each side moved a tiny amount and then gave up. No amount of heat, dead-blow hammering, would coax the pin out so I had to give up. I have since ordered a 20T press as I am determined to do this job through to completion.

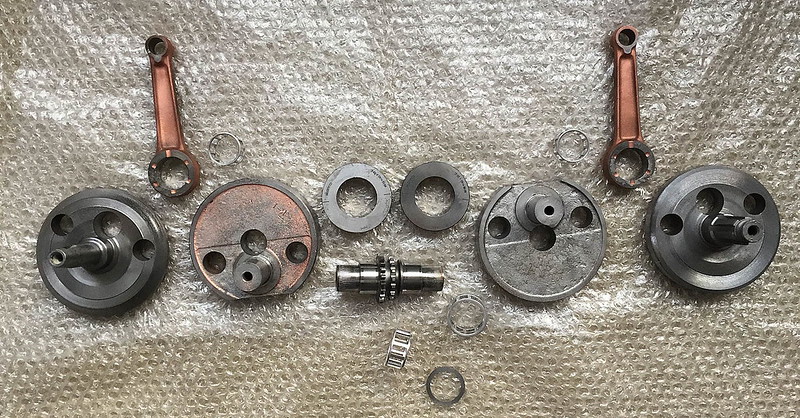
In the meantime, I set about cleaning and checking the parts. The big end of the rods looks OK but the small ends are very slack so I need to do something there.

Image

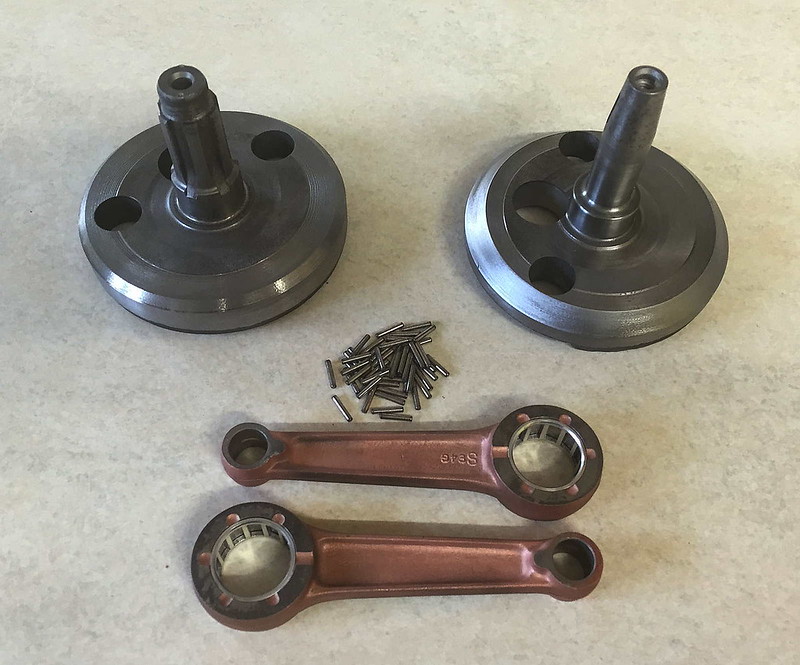
I managed to buy a large quantity of rollers for the big end but they are 2.5 x 13.8 rather than 2.5 by 13.5 that is required. I am going to lap the ends to shorten the rollers and for that purpose I have made a little lapping fixture to lap a quantity all at one time. The block is sized to the length I need then a flat cap is screwed to the block to make sure that all the rollers end up the same length.

Image


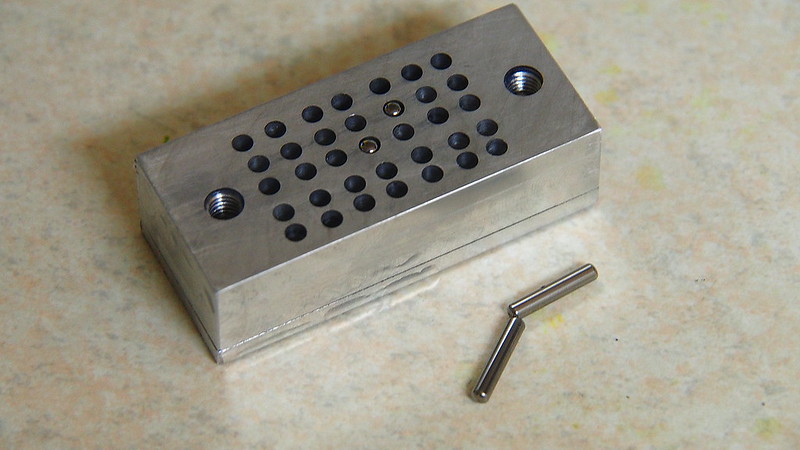
I'll let you know if that works.....

G
'60 C77 '60 C72 '62 C72 Dream '63 CL72
'61 CB72 '64 CB77 '65 CB160
'66 Matchless 350 '67 CL77
'67 S90 '77 CB400F

Steverino
honda305.com Member
Posts: 409
Joined: Wed Nov 05, 2014 10:22 pm
Location: Oregon

Post by Steverino » Wed Feb 25, 2015 6:57 pm

G-Man
When you first took your motor apart, did the filter, residue inside the engine cases or the oil itself accurately foretell the amount and type of debris you found in the crank?
Fascinating pictures and details by the way.
Steve

User avatar
G-Man
honda305.com Member
Posts: 5678
Joined: Wed Mar 25, 2009 5:17 pm
Location: Derby, UK
Contact:

Post by G-Man » Thu Feb 26, 2015 3:23 am

Steve

It's difficult to work out the maintenance history of the bike but the facts are that the motor was black inside, with black old mess in the crankcases. No signs of overheating anywhere and the 350 kit liners and pistons were in fine fettle. The crank turned smoothly but, as you can see, the webs were rusty. I'm pretty sure that the bike had been stored since 1973 with no filters on the carbs. There was dirt and grit on top of the pistons.

Image


Amazingly, the filter was pretty much empty, containing a small fraction of what was in the big end oil galleries.

I think that we can all draw our own conclusions but it's certainly steering me toward a detergent oil in the future. Having said that you cannot tell what the oil change interval was for this one or any of the others that I have stripped. I recently stripped the filter for a CB77 that came from the USA and the filter was caked in so much nasty stuff you could have built a driveway with it...

G
'60 C77 '60 C72 '62 C72 Dream '63 CL72
'61 CB72 '64 CB77 '65 CB160
'66 Matchless 350 '67 CL77
'67 S90 '77 CB400F

User avatar
G-Man
honda305.com Member
Posts: 5678
Joined: Wed Mar 25, 2009 5:17 pm
Location: Derby, UK
Contact:

Post by G-Man » Fri Feb 27, 2015 2:29 pm

My new press turned up and I spent the morning clearing a space and putting it together. I realised rather late that the bed wasn't wide enough to hold a crank so I had to modify that to make it wider.

Image

Impatience got the better of me and I set up the crank centre section to see if this machine was man enough to press the pin out. After a bit of re-work on the tooling the pin gave away with a massive crack, showering pieces and rollers all over the place.

After the excitement of having the same thing happen with the other side when I wasn't expecting it, I got the bits in the ultrasonic bath, followed by bead blasting, with a final wash in fresh fluid in the ultrasonic bath.

Even after that the oil centrifuge in one of the flywheels was still full of muck that had to be scraped clean before a another cycle in the blaster and ultrasonic cleaner.

Image

After final cleaning and drying here is the full (minus the rollers) collection of bits.

Image

Here is the cleaned out centrifugal big end feed showing a clear passage where the aluminium plug has been removed. That part is now all clean and bright.

Image


Here is the centre shaft with its serrated ends that proved so hard to remove. Those serrations put marks in the bores in the flywheels when its all pressed up. It increases the surface area of the joint.

The roller races look pretty nice but I'll measure everything up, just to be sure.

Image

Both centre roller cages look pretty nice and the rollers look OK to go back in as well.

Image

Next job is to contemplate some tooling to put all of the clean parts back together.

G
'60 C77 '60 C72 '62 C72 Dream '63 CL72
'61 CB72 '64 CB77 '65 CB160
'66 Matchless 350 '67 CL77
'67 S90 '77 CB400F

Superchicken
honda305.com Member
Posts: 213
Joined: Sun Sep 16, 2007 10:10 am
Location: Turlock, Ca.

Post by Superchicken » Sat Feb 28, 2015 11:07 am

G-Man, thanks a trillion, this site rocks

kenny258
honda305.com Member
Posts: 15
Joined: Mon Nov 14, 2011 5:11 pm
Location: chipping sodbury england

Post by kenny258 » Sat Feb 28, 2015 3:28 pm

I wonder if they had slipage and this was Hondas way around it.

User avatar
G-Man
honda305.com Member
Posts: 5678
Joined: Wed Mar 25, 2009 5:17 pm
Location: Derby, UK
Contact:

Post by G-Man » Sun Mar 01, 2015 8:01 am

Ken

Yes, maybe so. The torque from the right hand cylinder has to go through those interference fits to get to the primary drive. There's potentially a lot of torque and any impacts from seizures or other problems could unseat the fit.

G
'60 C77 '60 C72 '62 C72 Dream '63 CL72
'61 CB72 '64 CB77 '65 CB160
'66 Matchless 350 '67 CL77
'67 S90 '77 CB400F

Post Reply


CB-77 | CYP-77 | Road Test | Riding Log | Literature | Zen | Marketplace | VJ Survey | Links | Home