


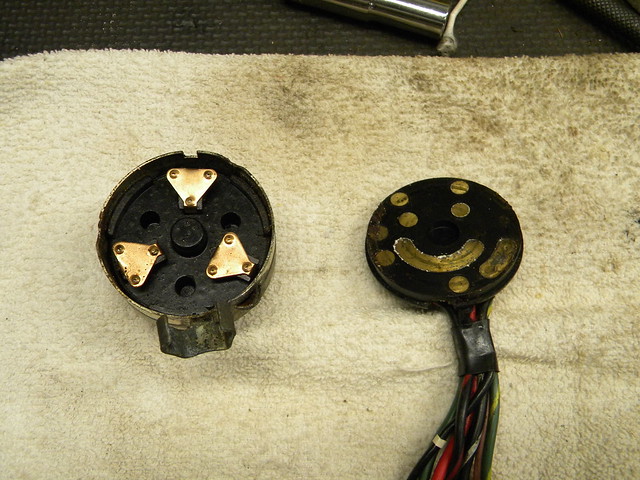
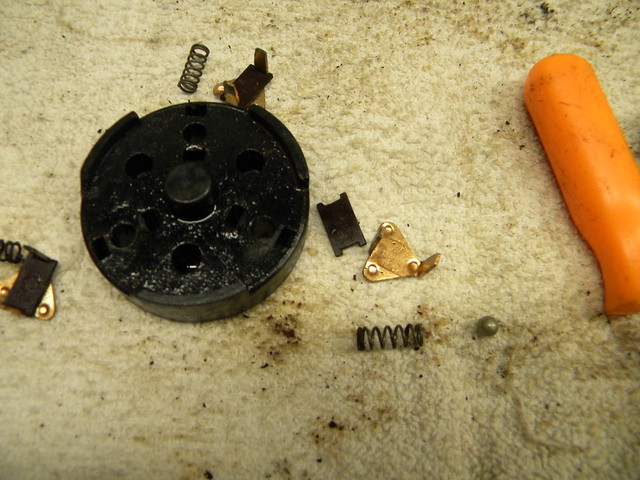
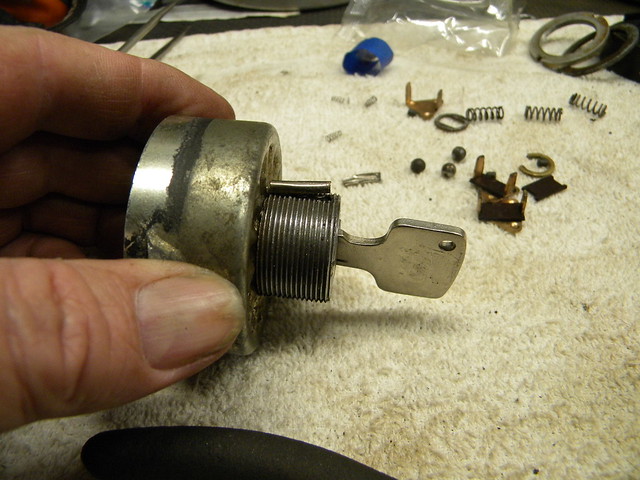
 Step 1: Lift Off Backing Plate by Dr. Frankenstein1, on Flickr
This is what you see when you bend the little tabs and take off the backing plate...note the position of each of the brass triangles.
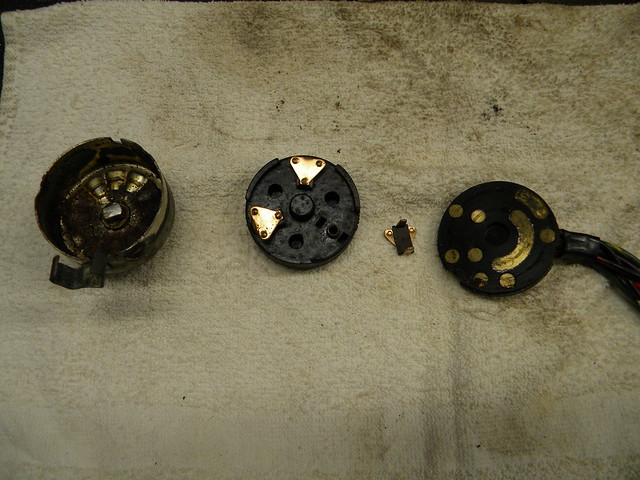 Step 2: Lift Out The Spring Plate by Dr. Frankenstein1, on Flickr
Lift out the spring plate; be advised there are ball bearings UNDER that plate, at the ends of three little springs...
 Step 3: Spring Plate Underside by Dr. Frankenstein1, on Flickr
This is what it looks like - note the one loose bearing, and the two rusted-in bearings.
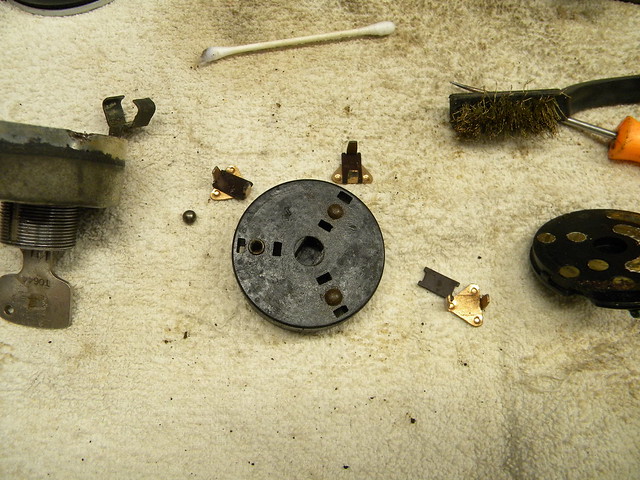
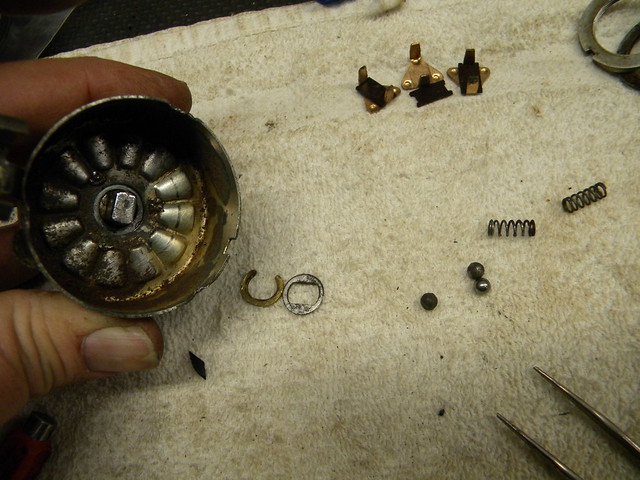
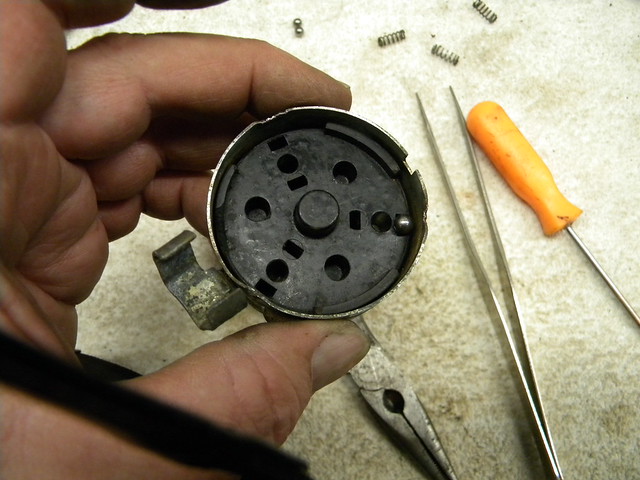
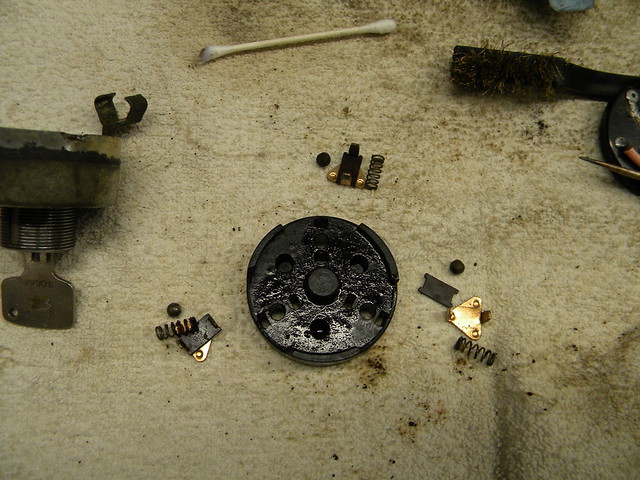 Step 4: Spring Removal by Dr. Frankenstein1, on Flickr
Each component of each position - brass plate with a little bakelite piece, the spring and ball bearing. Its a little cruddy because it has PB Blaster on it...
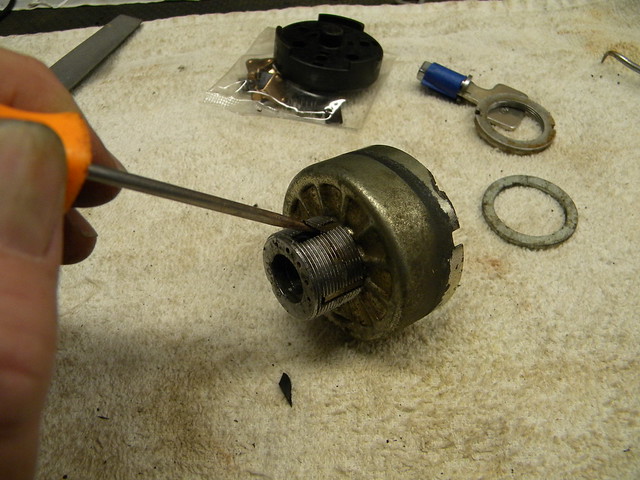
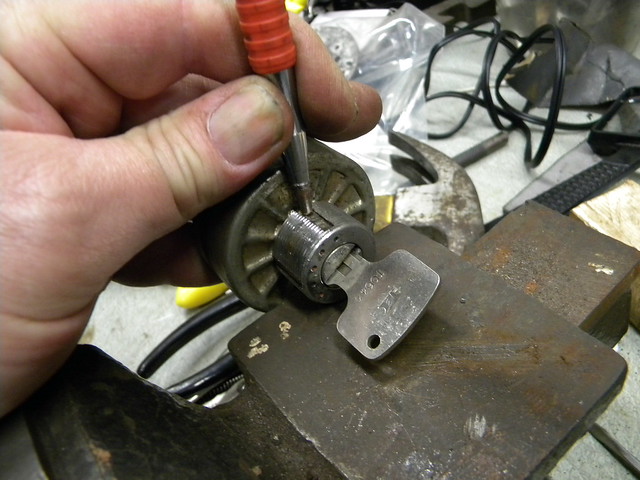
 Step 5: The Tumbler by Dr. Frankenstein1, on Flickr
If you look closely, you can see a C-ring under the end of the tumbler, which is on top of a little retainer-type clip/washer that slips down over the end of the tumbler...
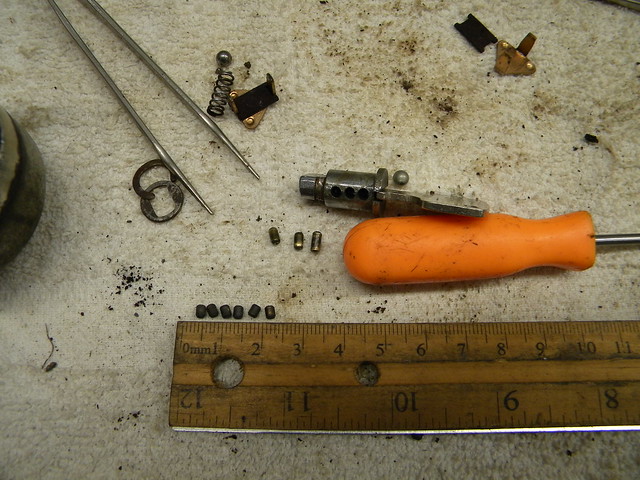
 Step 6: C-Ring and Retainer Removal by Dr. Frankenstein1, on Flickr
I removed these to expose the end of the tumbler. If you look closely, you can see some cross-punched 'welds' at 10:00, 2:00 and 6:00...these little welds, or studs, prevent the tumbler from coming out of the switch base, but you do NOT need to remove the outer tumbler to fix the switch, so do not worry about getting these two parts apart. USE CAUTION! When you tap out that center piece, which is the keyed center tumbler, there are six TINY springs and tumblers in holes inside that outer barrel that rest on the keyed tumbler - they WILL want to come out, so be ready for them. If you are performing this operation you'll see what I mean. Don't Lose Them! See Step #8 - see those six little tiny tumblers above the ruler ? That's them. And their associated springs are even Harder to see; so Be Aware.
 Spring/Ball Bearing Note: by Dr. Frankenstein1, on Flickr
This is a pic of a regular Daisy BB next to the spring - the BB is Almost the same size as the switch ball bearing, and I believe BB's could be used if you had to...
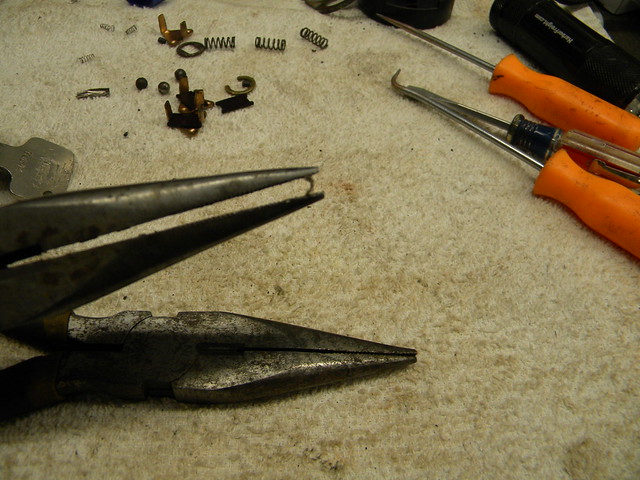
Step 7: Remove the Tumbler Covers - it's kind of hard to see here, but what I did was sharpen a Harbor Freight pick that I have and drove it/tapped it Under the edge of the little covering that goes over the outside of the tumblers - this takes some effort, but yes, it does come off. Use care though, because the tension created by lifting it up can send it into space - luckily I heard it hit my paint cans, and found it on the shelf! Whew...keep your finger on it. Do this for both of them, and try to lift up from the center, so it keeps a half-round shape, this is kind of imortant. More on this later.
 Step 7: Remove the Tumbler Covers by Dr. Frankenstein1, on Flickr
Step 8: Reinsert the Keyed Tumbler, seen here in the center with it's three littler tumblers. Pay attention to which tumbler comes out of which hole, and replace them the way they came out. I oriented the key to it's lowest mark on the switch, just to be sure, but I don't know if it makes a difference.
 DSCN1174 by Dr. Frankenstein1, on Flickr
Step 9: Placing the Teeny Tumblers. Here's the tricky part - insert the key and its three tumblers, then place three tiny tumblers in their holes, then place three little springs on TOP of them, with the narrower end facing up - this is the way they came out. Be patient, be CAREFUL - they ARE springs, and want to do nothing more than jump right out of there. Once inserted into its hole, the KEY tumbler acts as a base for the teeny tumblers and springs to rest on. The teeny (tiny??) tumbler goes into it's teeny hole first, followed by the spring. The teeny tumblers are all the same size, so I don't think it matters which teeny tumbler gets which hole, unlike the keyed tumbler...In any event, it should look like this - you can Just see each little spring sticking up out of it's respective hole:
 DSCN1178 by Dr. Frankenstein1, on Flickr
Step 10: Remember those little plates you took off the teeny tumblers? Here's where they go back on. Rest the plate on TOP of the springs, carefully press down on it and HOLD IT there! It WANTS to come off, and if it does those little springs will come with it; luckily I found mine.
 DSCN1180 by Dr. Frankenstein1, on Flickr
I found it easiest to bend those little plates into a crescent shape before I tried to put them back in...this way they go right down into the tumbler slot, and are easier to hold down as you tap them in...this is a view of the little tab as seen end-on..
 DSCN1179 by Dr. Frankenstein1, on Flickr
Step 11: Tapping Them In - this is why it's important to try to make sure those little cover plates keep a half-round shape - they have to fit in to the slot it came out of. I used a punch and pressed really hard to get them to stay, and then gently tapped them flat. Again, keep pressure on that plate while you do this, or bad things will happen.
 DSCN1181 by Dr. Frankenstein1, on Flickr
Step 12: Replace the Tumbler Metal Gasket and the C-Ring: The C-ring goes on TOP of the little metal gasket; use some needle nose pliers to crimp it in under the center post.
 DSCN1182 by Dr. Frankenstein1, on Flickr
Step 13: Replace the Ball Bearings in Their Holes
 DSCN1183 by Dr. Frankenstein1, on Flickr
Step 14: Replace the Springs...I sanded the ends of mine down just to make sure I had a good contact with the ball bearings...
 DSCN1184 by Dr. Frankenstein1, on Flickr
Step 15: Replace the little brass(?) plates and their bakelite insulators - Note the position of the plates: Two have 2 dots on the Outside, One has ONE dot on the outside...I don't know if it makes a difference, but I tried to orient the plate to the way it was when it came out. I used the wire clamp on the switch housing as a reference. Replace the switch backing plate, then use some pliers to press the outside tabs back in to hold the rear of the switch on. Check for proper operation....
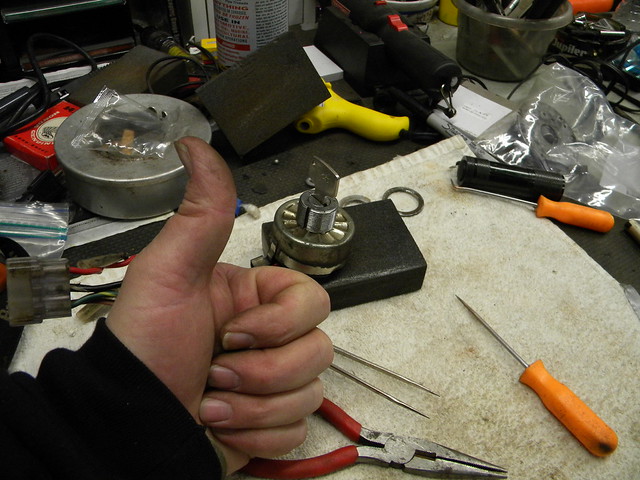
Step 1: Lift Off Backing Plate by Dr. Frankenstein1, on Flickr...and give yourself a big Thumbs Up for saving your switch, and anywhere from$100 to $300!
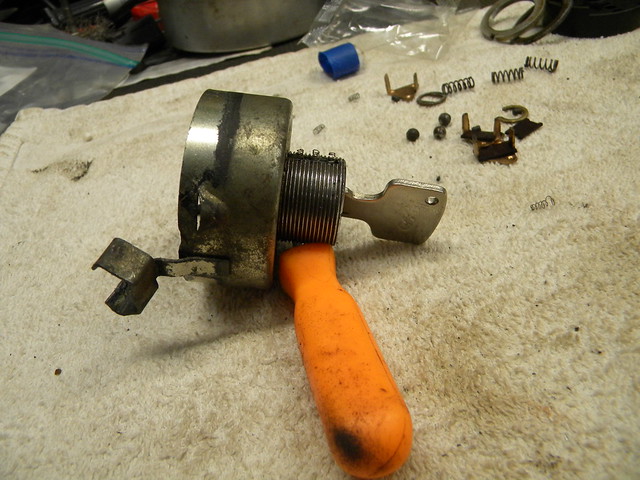
 DSCN1186 by Dr. Frankenstein1, on Flickr
I would say the hardest/trickiest part of this procedure is getting that little tumbler plate peened, or pushed, or whatever you want to call it, Back In without losing the teeny tumbler springs. I didn't use one this go-around, but seriously, in line with what DJM posted below, you might want to consider doing this in a big box set on it's side or something. I got VERY lucky twice, when those little tumbler springs got loose, and let me tell you, they go Far, and you won't see them go! Luckily I heard them hit stuff, and I moved very carefully and slowly to be able to find them, which I was very happy I did. A flashlight helps.
In retrospect, I think the problem with the switch was those rusted-in ball bearings. Knowing what I know now, I would have left the keyed switch alone and just taken out the big round bakelite spring/bearing plate and made sure the bearings were freed up; But, as it was, I learned a lot and I hope this little tutorial helps.
By the way, the posts below/after this tutorial occurred BEFORE I repaired the switch, so don't be confused by my posts below indicating some confusion over it's repair; just sayin'...;)
Although if all else fails, the marine switch I mention in one of the following posts does look promising...
And here are some older posts regarding the switch from bjshealy on the forum- there's some good info regarding the placement of those little brass triangles:
http://www.honda305.com/forums/1965-ca7 ... t6331.html