honda305 Home honda305 Auctions honda305 Gallery honda305 Forum


honda305.com Forum

Login
□ Search
□ FAQ 
□ 
Vintage Honda Owners,
Restorers, Riders and
Admirers

Project CB92 - A Journey to Resurrection

JC56, JC57, C70, C71, CB71, CE71, CS71, CSA71, CS72, CSA72, C75, C76, CA76, CS76, CSA76, CS77, CSA77, CB92, CA95
User avatar
Rizingson
honda305.com Member
Posts: 57
Joined: Mon May 07, 2012 6:50 pm
Location: Parker, CO USA

Post by Rizingson » Mon Mar 07, 2016 6:15 pm

While all the painted parts are getting blasted, primed and painted, it gave me a few moments to work on some other needed items, such as polishing some of the shiny aluminum parts and chrome bits and bolts. It was also time to restore the wheels, since they were pitted beyond reusing them and re-chroming is often more expensive than replacement. So I guess I'll make this update about wheels.
The CB92 came out originally with DID wheels, so I was happy to find an exact OEM replacement pair from David Silvers Spares. The spokes were still in good condition, so cleaning and polishing them would suffice.

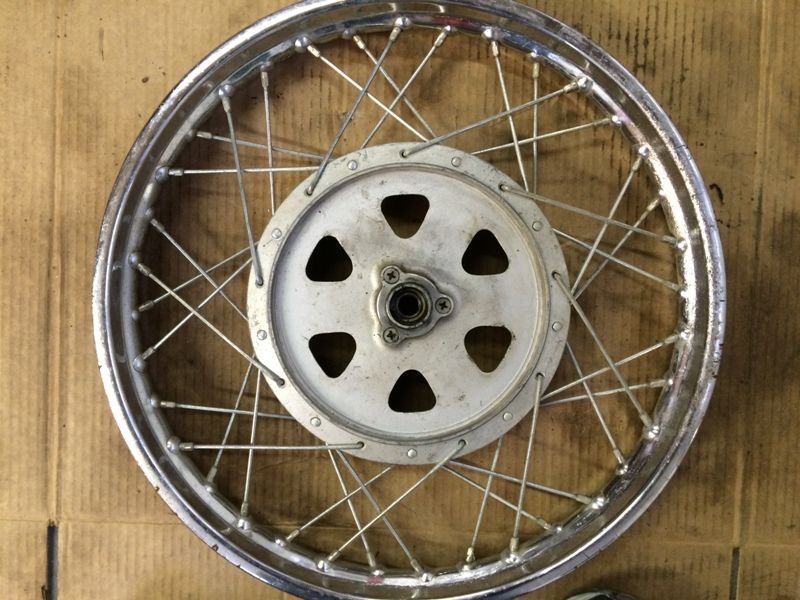
The front wheel ready for disassembly. The pitting was worse than this picture makes it look.
Image

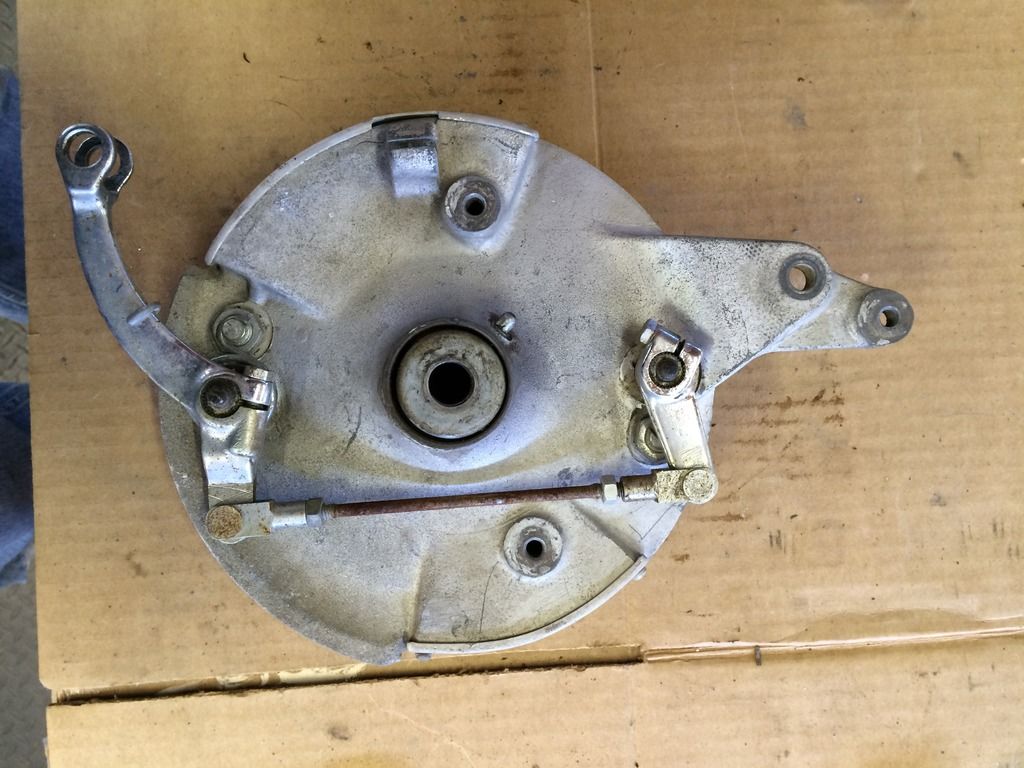
Here you can see that the chrome front brake linkage needs some cleanup as well as the magnesium backing plates.
Image

I know that there's plenty of instruction on the web as to properly lacing in a new wheel, but thought I'd go through some of the steps I use when doing it. Every vintage Japanese bike I'm aware of uses a Cross 4 pattern so once you get the hang of that, it's pretty straight forward.
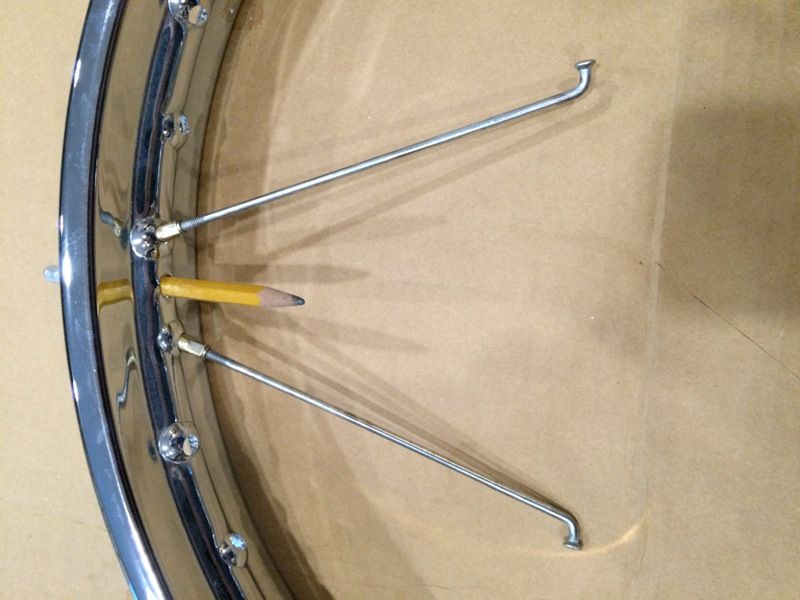
The first thing you should note, is a measurement of the wheel offset, by laying a straight edge across the brake hub and then measuring the distance at the ends to the wheel. Doing one side is sufficient. Then when you start removing the spokes and if you plan to reuse them be aware that the outer spokes are bent at a sharper angle at the hub than the inner spokes, so always keep them separated. I wanted to also point out that before you start putting in spokes haphazardly, that you pay attention to where the valve stem will be located. Make sure the spokes angle away from the valve stem to give you clearance to inflate the tire. Also both spokes adjacent to the valve stem are always inner spokes.

Picture of valve stem location and adjacent inner spokes.
Image

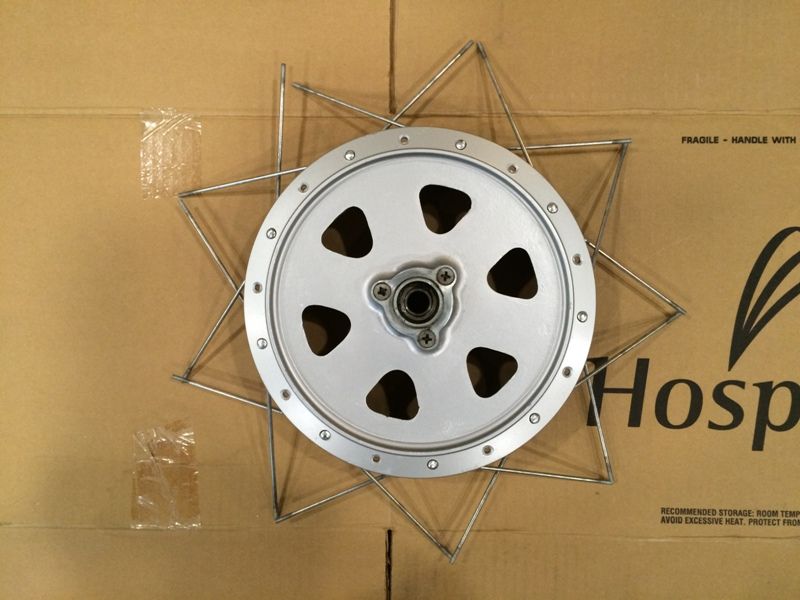
When actually installing the spokes I like to place all the inner spokes through the hub skipping every other hole on both the left and right side of the hub. You should also use the same holes that were inner spokes before. Usually there are indication marks on the hub where the outer or tails left a mark from the previous installation.
After all the spokes are inserted, make sure they are crossed over just like this photo, because you cannot change the sides which they cross after you start putting the nipples on through the rim.
Image

Laying them out in this pattern also allows you room to put the wheel over them. Then begin at the valve stem by installing the nipples, leaving about 4 threads visible all the way around the rim.
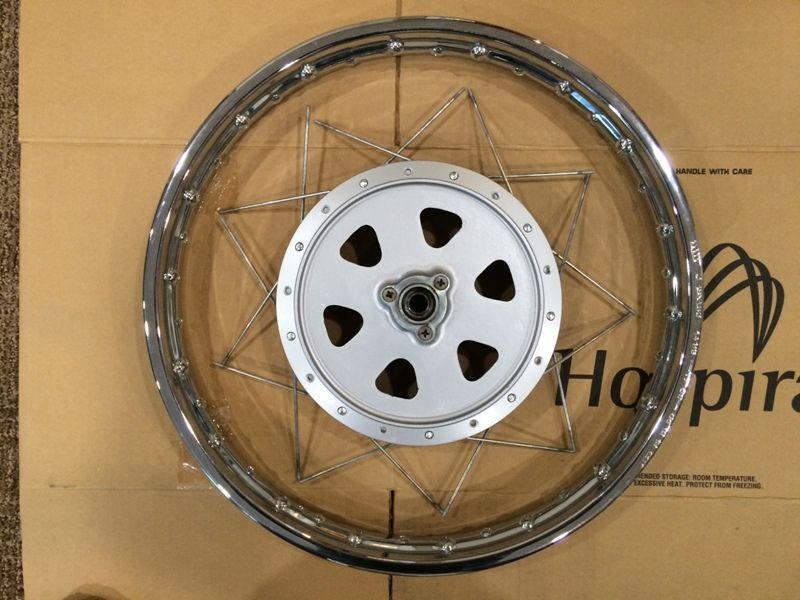
Image

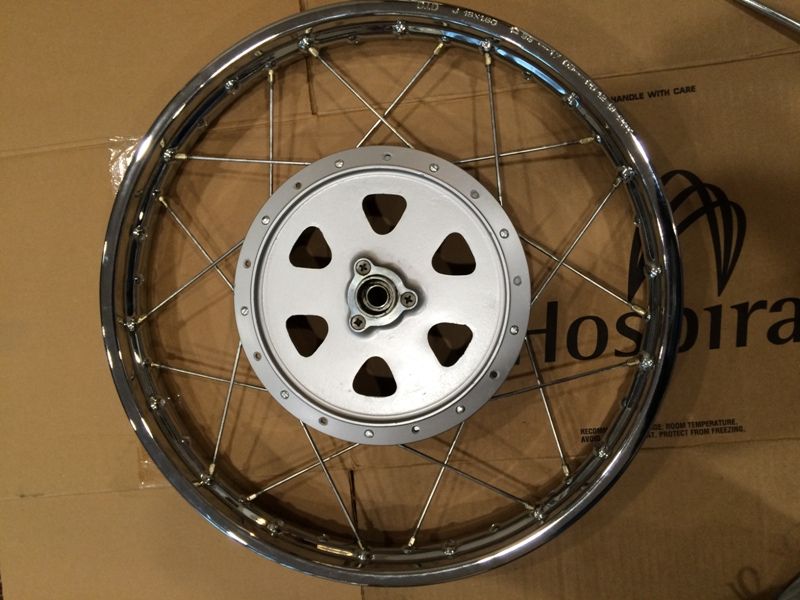
...and here's the wheel with the inner spokes installed.
Image

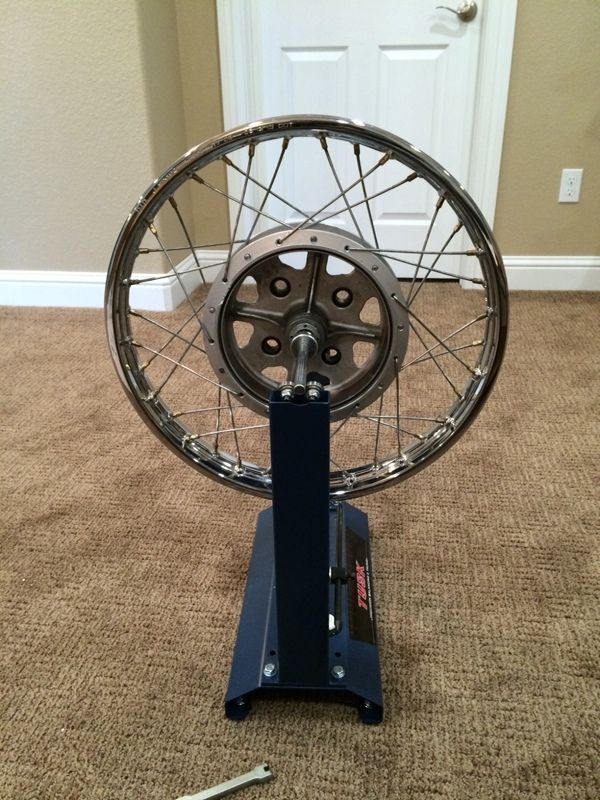
The outer spokes can then be easily installed in the remaining hub holes by pushing them through from the opposite side, without any clearance issues. Once they are installed, then it's on to the truing stand to start to begin the somewhat tedious process of aligning the wheel. I start by first getting the "hop" out of the wheel (or out of round) by slowly tightening the four spokes directly across the hub from the high point. Once I'm satisfied with that, I work on the wobble by tightening the 2 spokes on the opposite side of the rim. Usually work in small increments of one half or one quarter a turn at a time.

Here's the front rim on the stand will all spokes installed and beginning the truing process. Note the distinct groupings of 4 spokes, making up the cross 4 pattern.
Image

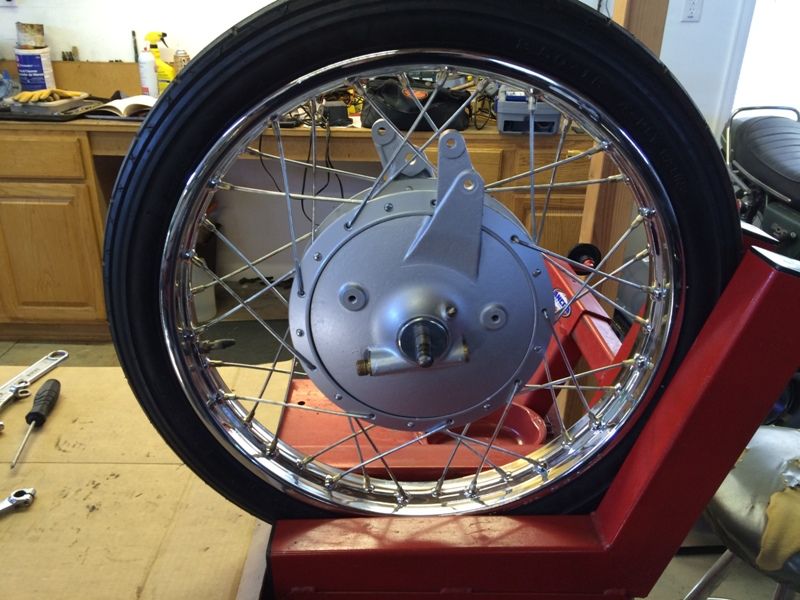
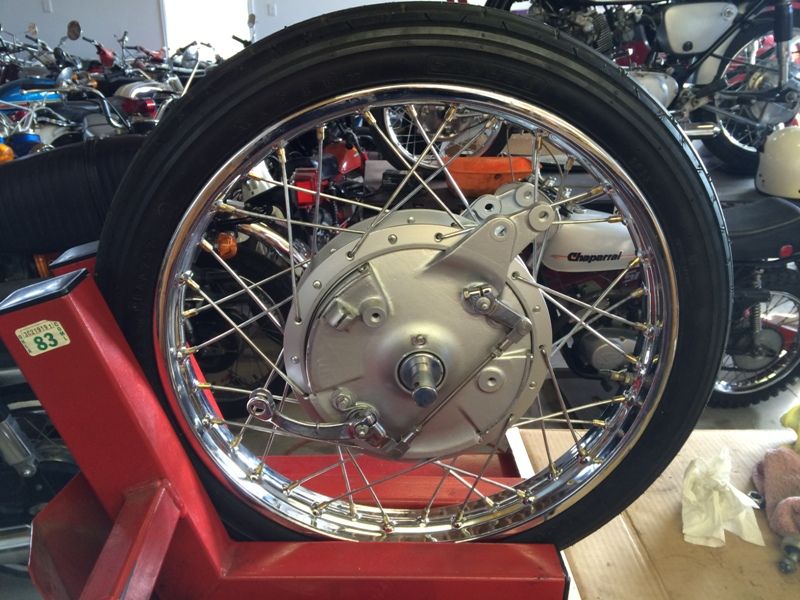
After installing the tire, here it is back in the wheel chock with the brake plates installed.
Image

The magnesium hubs and plates were cleaned and then painted with a matching color caliper paint. Also left unpolished, as they originally had somewhat of a rough texture when new.

....and then the linkage is synced back up for proper brake engagement.
Here's the renowned CB92 front brake that was considered to be ahead of it's time in 1959. Notice I have the air scoop covers on.
Image
later...when further updates are available.

User avatar
Rizingson
honda305.com Member
Posts: 57
Joined: Mon May 07, 2012 6:50 pm
Location: Parker, CO USA

Post by Rizingson » Tue Mar 15, 2016 5:16 pm

Not much progress this week, but finally got the parts back from paint, however the "Cloud Silver" was not correct so all those parts went back to be re-done in an acceptable shade. Yeah, sometimes I'm a bit picky! But even with this setback of schedule, I still felt I needed to press on with the project, although it may require somewhat of an unorthodox method of assembly since the front fender must be installed onto the brake hub before the front wheel is in place. I'm also waiting on the new center stand bushing as well.

So the first step in assembly, was installing the front shock absorbers into the newly repaired pressed steel forks.
Image

......here's another angle of the leading link suspension system with fork lock added.
Image
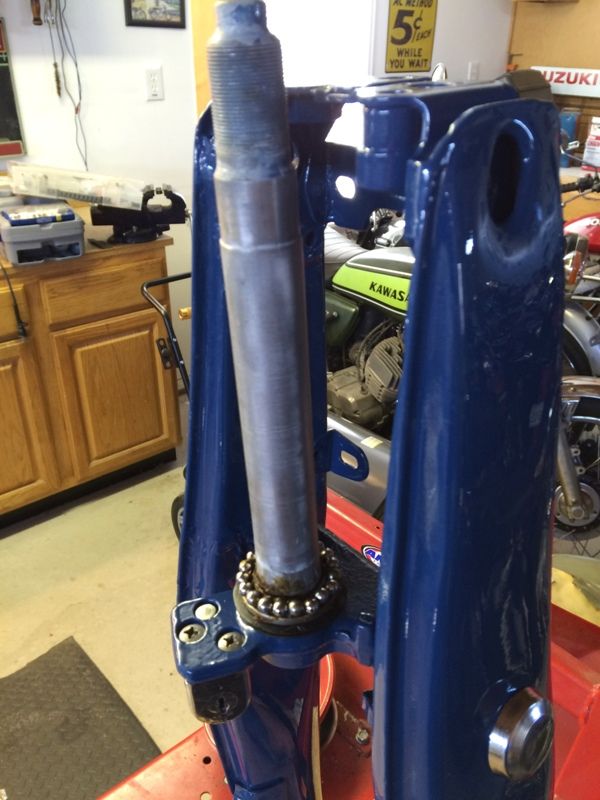
Unfortunately I'll have to remove all the paint from the triple tree stem, in order to get both sets of bearings installed.

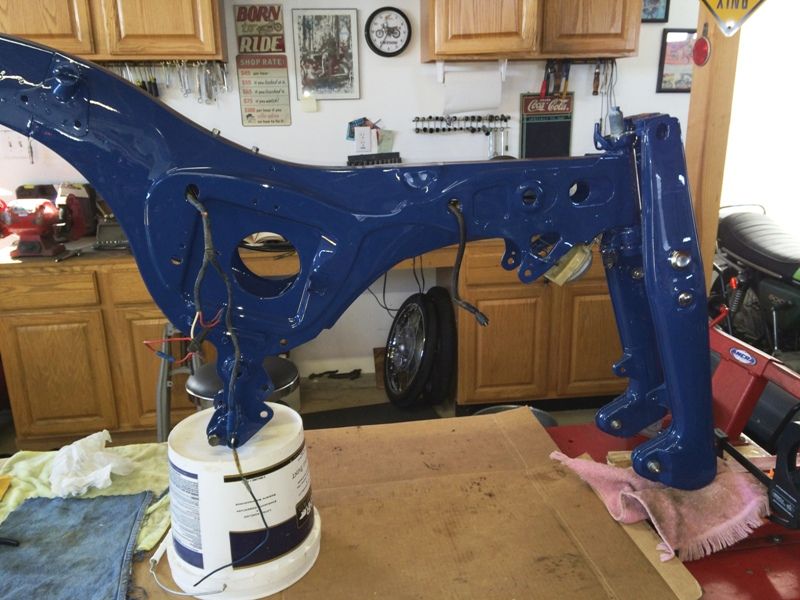
Here's the frame, ready to go!
Image

After flipping the frame over to begin the electrical harness installation along with the coil and rectifier, I also prepared the frame for good ground contact to the motor and rectifier.
Image

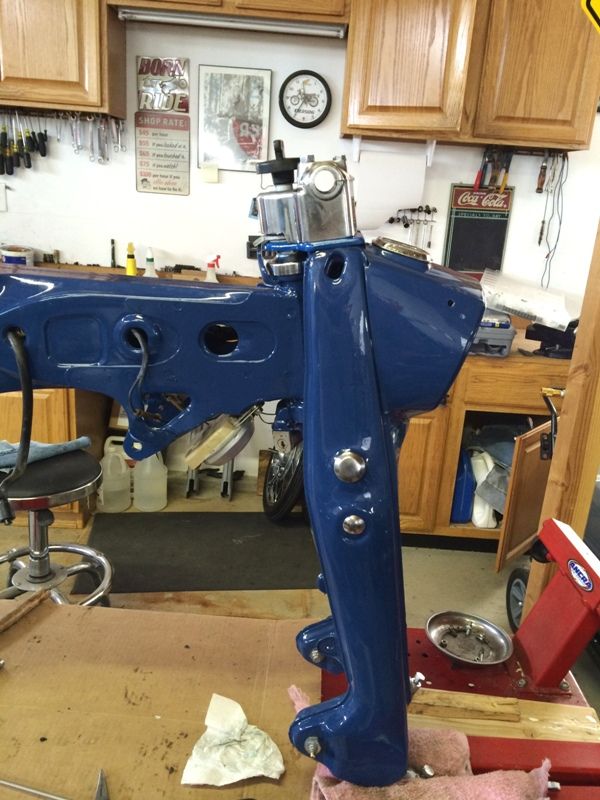
I then focused on getting the triple tree together next. First removing the paint from the stem and then placing in the wheel chock, so I can get it to stand vertically to make it easier to install the grease seal and washer as well as the 19 balls on the lower race.
Image

Once the lower bearings are in place I just pick the frame up and set the neck over the steering stem while it remains in a locked vertical position. This works well for me as the bearing stay in place along with a little fresh grease.
Image

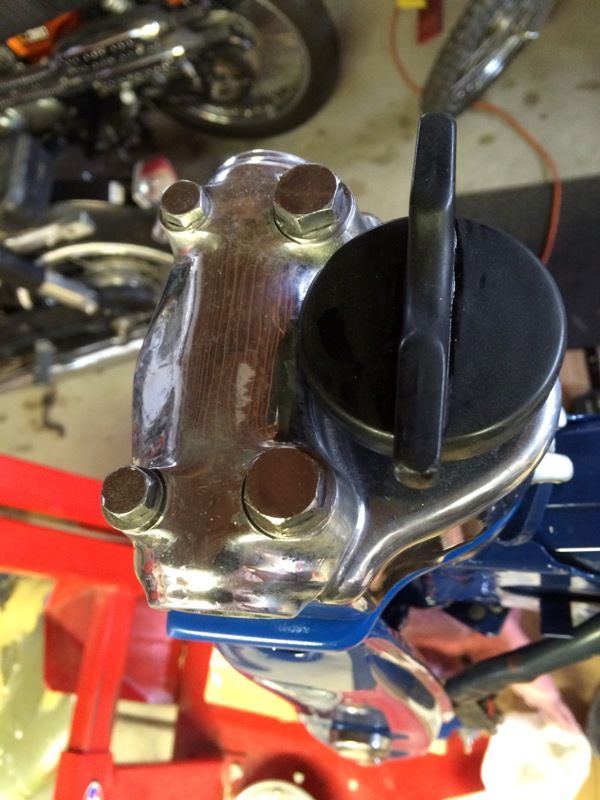
Next the upper bearing, with it's 18 balls are put in place followed by the appropriate washers and nut.
Image
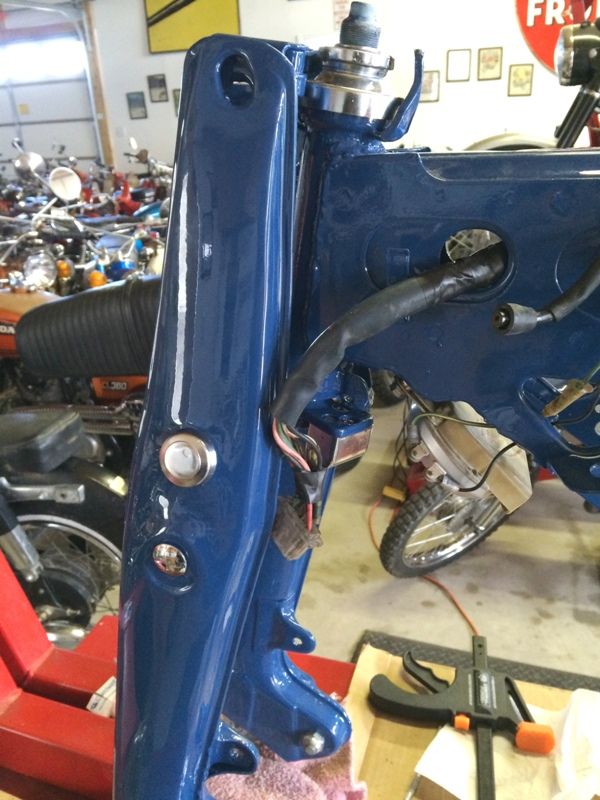
Also the new chrome caps that were originally missing are now on the upper part of each fork leg.

After adjusting the bearings, installing the steering damper controls with it's multi friction plates are put in place.
Image

Putting on the headlight housing with speedometer and neutral light as well as the horn provide a good stopping point for now.
Image

I'm in a quandary now as whether to install the engine before the front wheel assembly. This is because I'm in the middle of shoulder therapy after tearing a tendon in my right shoulder (lot's of cortisone and other drugs are helping). Not sure if I can lift it safely, working alone as I do, easier with the wheel off making it lower to work into place.
Hopefully more parts will arrive soon for further progress and updates.

User avatar
Hamamatsu Nippon
honda305.com Member
Posts: 111
Joined: Sat Nov 12, 2011 6:37 pm
Location: SW Ontario, Canada

Post by Hamamatsu Nippon » Wed Mar 16, 2016 12:06 am

Looking good Rizingson, it's coming together quickly.
1967 CA78
1965 CM90

The value of life can be measured by how many times your soul has been deeply stirred.
Soichiro Honda

Steverino
honda305.com Member
Posts: 409
Joined: Wed Nov 05, 2014 10:22 pm
Location: Oregon

Post by Steverino » Wed Mar 16, 2016 10:30 am

I had a CA95 that I had to replace the crankset on a few years ago and after repairing or replacing the wiring harness and coil and rectifier I was really surprised to see in your upside down picture just how much room to work there is in there. If I ever get inside another one I am going to flip it while the motor is off and work on it the easy way.
S

cknight
honda305.com Member
Posts: 427
Joined: Wed Apr 05, 2006 3:55 pm
Location: Daytona Beach, FL

Post by cknight » Sun Mar 20, 2016 9:32 am

Great progress on one of my favorite bikes. Never owned one, but worked on a few. The finish on the hubs has that "mag" quality right on. After studying the images, it looks like the spokes and nipples appear to have a bow in them after the final truing. The direction of the bow would indicate the rims were drilled for a smaller diameter (and possibly narrower between flanges) spoke circle in the hub. Put a straightedge up to the spokes and double check. The CB72/77's have a 230mm spoke circle on the hubs, the CB160's are 210mm, and even with that seemingly small difference, those rims are not properly interchangeable. I don't know what the CB92 hub dimension is. As pieces for these become increasingly scarce, some part number substitutions might be made that aren't really correct. What part number rim is this? Regards, Chase

User avatar
Rizingson
honda305.com Member
Posts: 57
Joined: Mon May 07, 2012 6:50 pm
Location: Parker, CO USA

Post by Rizingson » Sun Mar 20, 2016 7:18 pm

Rims are stamped D.I.D. J 18x1.60 - 14 96 - 17 09 front and rear. Not sure what those numbers indicate as I can't find any catalog info from D.I.D. The CB92 hubs are a one model only (P/N 44701-205-000) and have a 230mm spoke circle. I believe you are absolutely correct in your assessment. Thanks for your keen eye, I put a straight edge on them and there is a very slight bend about a 1/2 inch in from the nipple, which I didn't even notice when assembling. (I'm now sick to my stomach) They are probably for a CB160, however David Silver Spares USA shows the CB160 rim as a J 18x1.85 which I believe is too wide, since both of my CB160's rims appear to be the same width as these 1.60's.
cknight, I sent you a PM.

User avatar
Rizingson
honda305.com Member
Posts: 57
Joined: Mon May 07, 2012 6:50 pm
Location: Parker, CO USA

Post by Rizingson » Mon Mar 28, 2016 6:30 pm

Talk about taking a break from this project! Along with recuperating for a week long bout with pneumonia and getting lazy, I got side tracked on some other projects as well. Finally got back to it today and hopefully I'll stay a little more focused on the CB92 now!

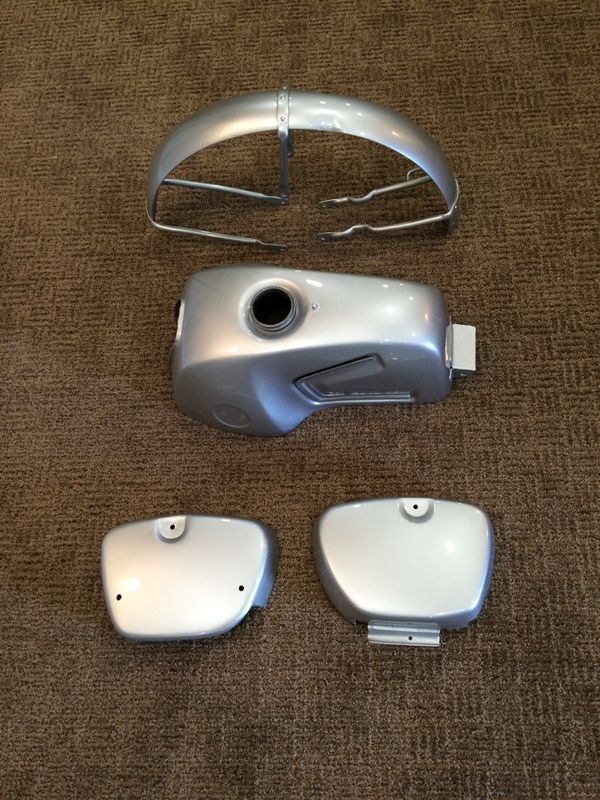
As mentioned earlier, I had to return the cloud silver parts, as they weren't the right shade of silver. Finally did get them back and now they are looking spot on!
Image
After speaking with some other owners of this model, I reluctantly decided to go ahead and paint the anodized alloy fender silver, as is done on the '62 steel fender model. Since there is no one in the anodizing business and there were a few scratches in the soft alloy that just couldn't be made to look right again.

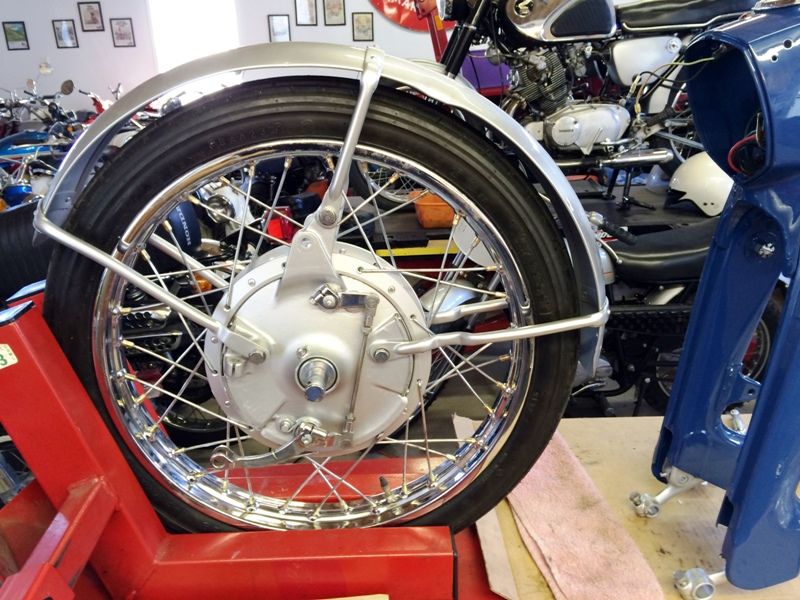
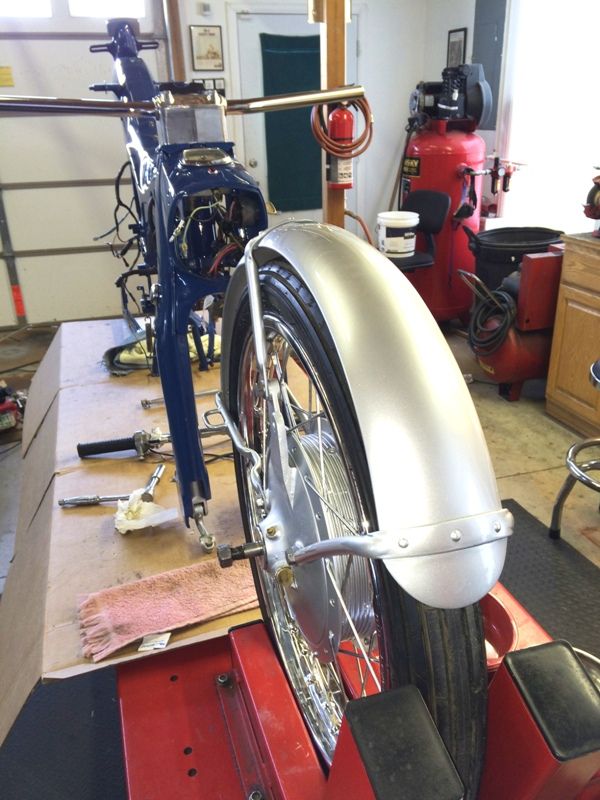
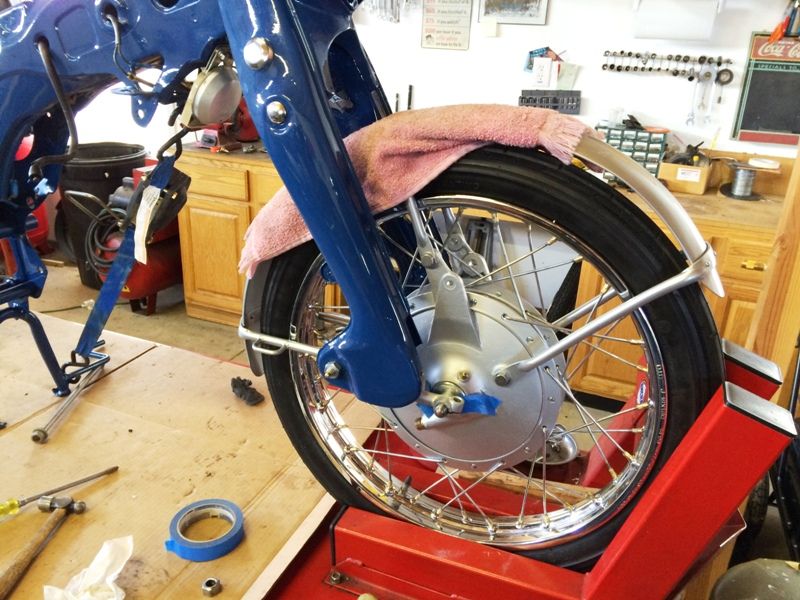
Since the front fender is mounted to the front brake plates, it must be installed on the wheel prior to mounting the axle bolt.
Here the front wheel is set into the wheel chock to hold it in place, while attaching the fender with six bolts.
Image

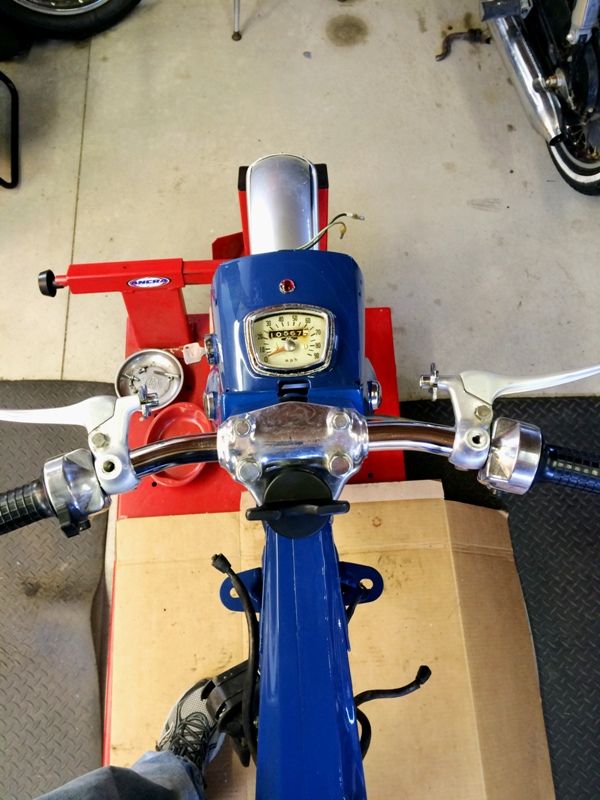
Then to make it steadier for me to lift the frame in place, I installed the new OEM handle bars, which replaced the lightly pitted originals.
Image

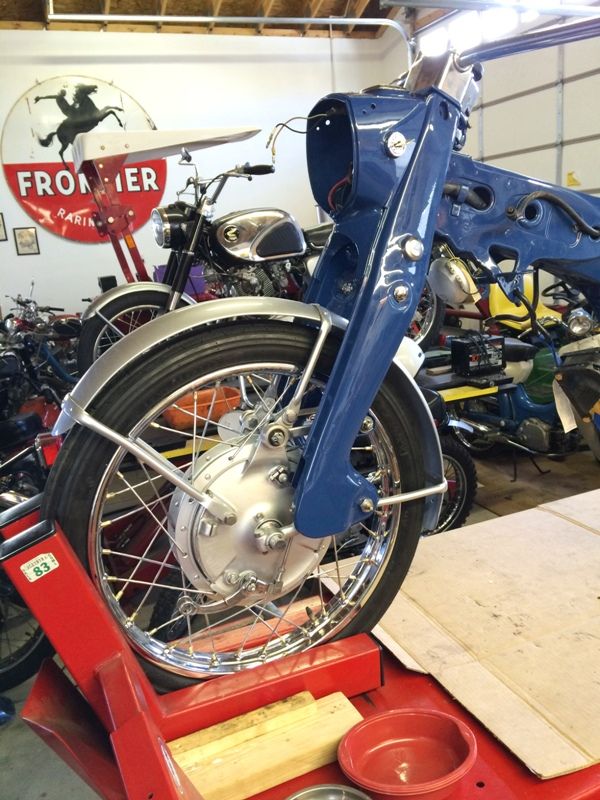
While carefully protecting the fragile fender from accidental scratches, I lifted the forks up over the wheel, carefully lowering it until I could slidel the axle through the hubs and then installing the pinch bolts.
Image

In order to keep the fender from rotating, both front brake stays were installed. None of the parts, such as the brake stays are symmetrical, so careful attention must be used to avoid installing backwards or on the wrong side.
Image

Once the front wheel was securely in place, it was time to add the polished control switches and perches to the new bars.
Image

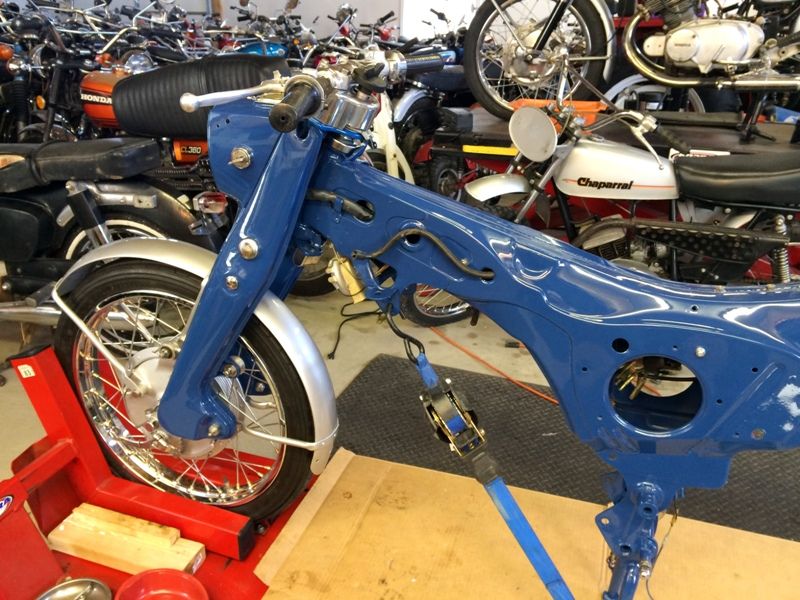
Here's a view of the left side. Also thought I'd mention that the tie down you see is to hold the center stand securely in the upright position. From past experience, I've had too many close calls with the stand folding up on me at just the wrong time, and nearly causing an accident. This way I can slide the bike forward and backward without having to be concerned about a surprising collapse.
Image

....until further updates!

Post Reply
cron


CB-77 | CYP-77 | Road Test | Riding Log | Literature | Zen | Marketplace | VJ Survey | Links | Home