Want to keep a Restoration Log? Post it here! You can include photos. Suggested format: One Restoration per Thread; then keep adding your updates to the same thread...
-
LOUD MOUSE
- honda305.com Member
- Posts: 7818
- Joined: Mon Aug 15, 2005 8:23 am
- Location: KERRVILLE, TEXAS
Post
by LOUD MOUSE » Sat May 29, 2010 1:07 pm
There are 2 designs of that switch.
A 4 wire and a 5 wire
The 4 wire will turn (the wing) to the left and not to the right.
The 5 wire will turn both ways with the middle being off. ............lm
maia wrote:Before I take it apart.........according to the schematic the headlight switch has 3 positions, left , dash and tailight, right, headlight and extra charging coil. Apparently there is a centre position where nothing is connected. My switch has no central indent where there are no connections made and I'm thinking of disassembly to see what is going on in there. Can anyone offers an opinion on my observations? Thanks a lot guys.
-
maia
- honda305.com Member
- Posts: 132
- Joined: Sat Aug 29, 2009 8:29 pm
- Location: Courtenay,vancouver Island B.C. Canada
Post
by maia » Sat May 29, 2010 2:00 pm
I will stop searching for the middle indent......I've got a 4 wire. That saved me a lot of work, thanks LM
-
LOUD MOUSE
- honda305.com Member
- Posts: 7818
- Joined: Mon Aug 15, 2005 8:23 am
- Location: KERRVILLE, TEXAS
Post
by LOUD MOUSE » Sat May 29, 2010 2:03 pm
You're welcome.
I figured ya do. ...............lm
maia wrote:I will stop searching for the middle indent......I've got a 4 wire. That saved me a lot of work, thanks LM
-
maia
- honda305.com Member
- Posts: 132
- Joined: Sat Aug 29, 2009 8:29 pm
- Location: Courtenay,vancouver Island B.C. Canada
Post
by maia » Sun May 30, 2010 7:24 pm
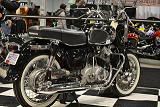
Still plugging away at it....the wiring is almost sorted. Turned the key on for the first time and a few odd things happened but I'm fixing them one by one. The starter spins it over which is a bit of a miracle since it was COMPLETELY rusted together when I took the end caps off. The armature was barely recognizable. It took a week to get it out and a couple more to re-furbish it. Just got the seat back from the shop which they had to refoam. The cover is from a fellow in Alberta, nice work. I found a new chrome strip off ebay which I will be putting on. The bolts that hold the strap on are toast so I'll have to come up with something to match the nicely re-chromed seat strap ends. Those bolts seem unobtainable. Have a sealed beam on order as the the one I had blew right away, must have had a leak or something. Last major job is building a new front wheel. I have an Akront alloy rim that needs some polishing then it will be an Avon Roadrider 90/90.
-
Attachments
-

-
maia
- honda305.com Member
- Posts: 132
- Joined: Sat Aug 29, 2009 8:29 pm
- Location: Courtenay,vancouver Island B.C. Canada
Post
by maia » Tue Aug 24, 2010 10:47 pm
Front wheel built, a few details to look after then it's time to look for a spark.
-
Attachments
-

-
Tango911
- honda305.com Member
- Posts: 359
- Joined: Tue Jul 27, 2010 9:19 pm
- Location: Brownsburg, Indiana
Post
by Tango911 » Wed Aug 25, 2010 8:28 am
wow amazing, i wish i had the guts to tear down and do a build like that. maybe someday.

65 Sears Puch 250
69 Dream 305
74 Kawi H1
78 CB750 SS
-
nc_rider
- honda305.com Member
- Posts: 111
- Joined: Tue May 04, 2010 2:35 pm
- Location: Concord, NC
Post
by nc_rider » Wed Aug 25, 2010 11:07 am
looks awesome... can you give details on the alloy rims? Why did you use them (rather than the steel replacements found on fleaBay)? Where did you get them from?
... and what paint did you use on the engine cases?


