Ground up: making a SuperHawk from scrap
Next step: the crank bearingsOne of the big stumbling blocks in putting this engine together was the ball bearing replacement for the original roller bearing on the crankshaft. Despite (I later discovered) having a drawer full of old roller bearing parts, we decided it was necessary to make a ball bearing work.
Taking my best guess at bearing thickness, I ordered one up with the right ID, and set about to machine a sleeve that would establish the right OD, and would allow me to add the cross-drilled feature for the knock pin. This turned out to be the wrong thickness, but that's a story for later. 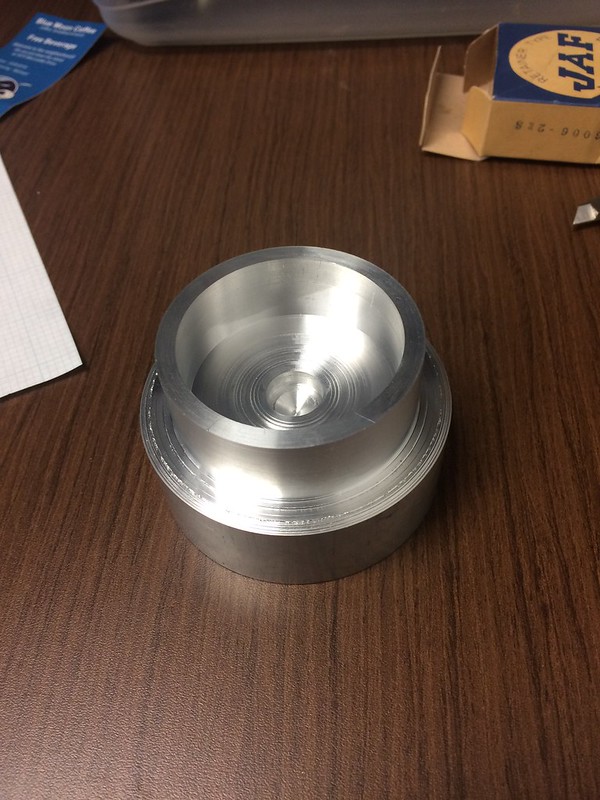 [/url] [/url]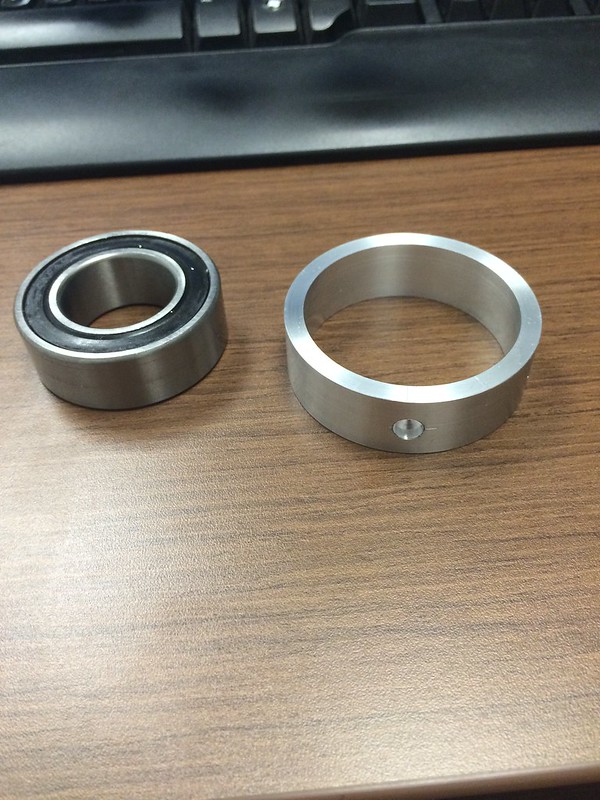 [/url] [/url]Nice work. If you are going to replace the roller bearing with a ball-race - take a close look at how the oil feed to the bearing works. The oilways in the case match up with an oilway in the bearing. Honda changed those oilways when they changed from a ball race (early) to a roller (later). When they recommended replacing the bearing on a worn crank they did not make any recommendations what to do with the oilway which gets blocked off by the outer race of the ball-race. You can make a little slot to extend that oil feed to the outside of the ball race as in the earlier design.
This is an early type case designed for a ball race (with one shield). 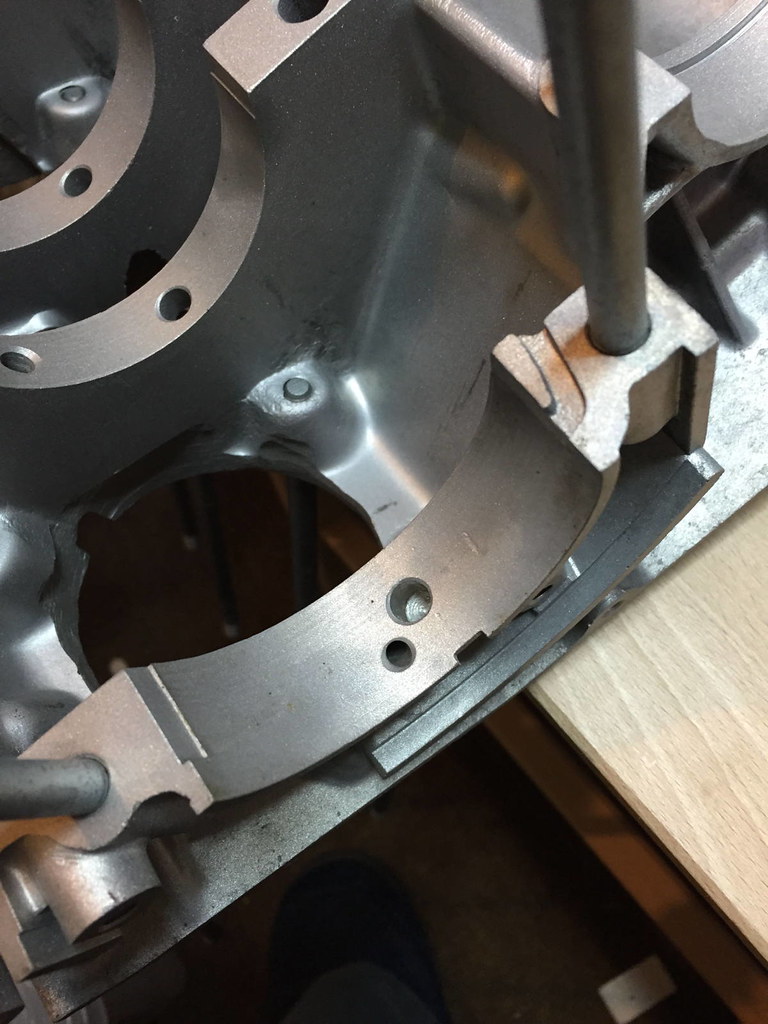 This is a later case designed for the roller bearing. 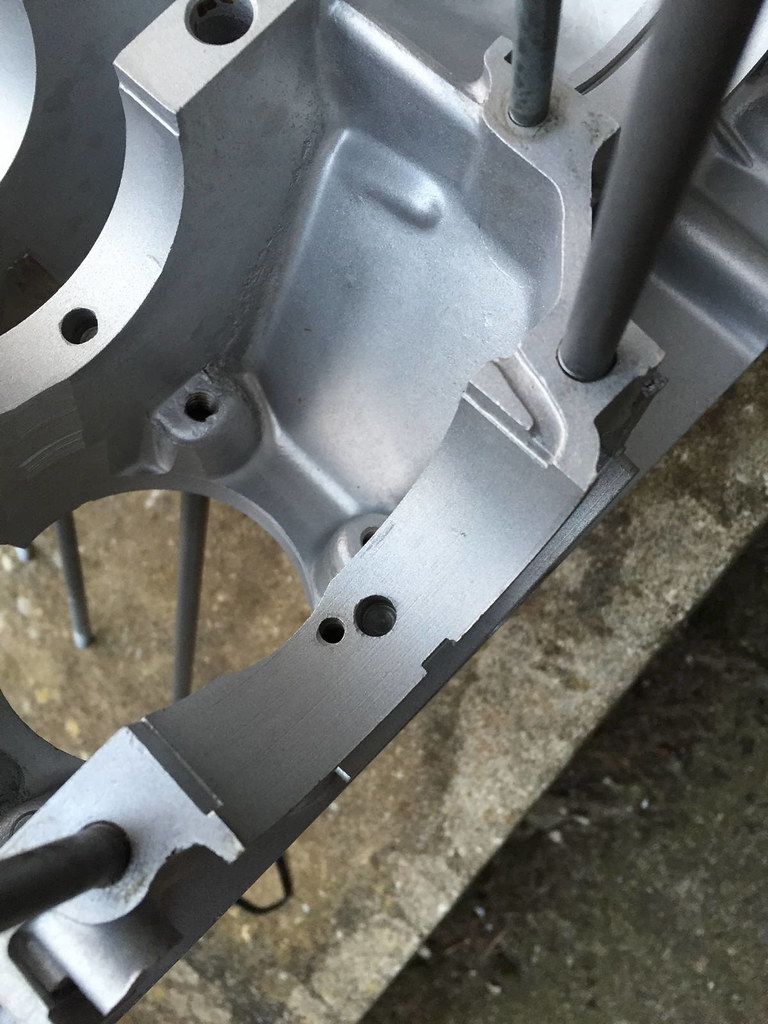 Here is an 'interim' NOS case I picked up with both types of drillings...... 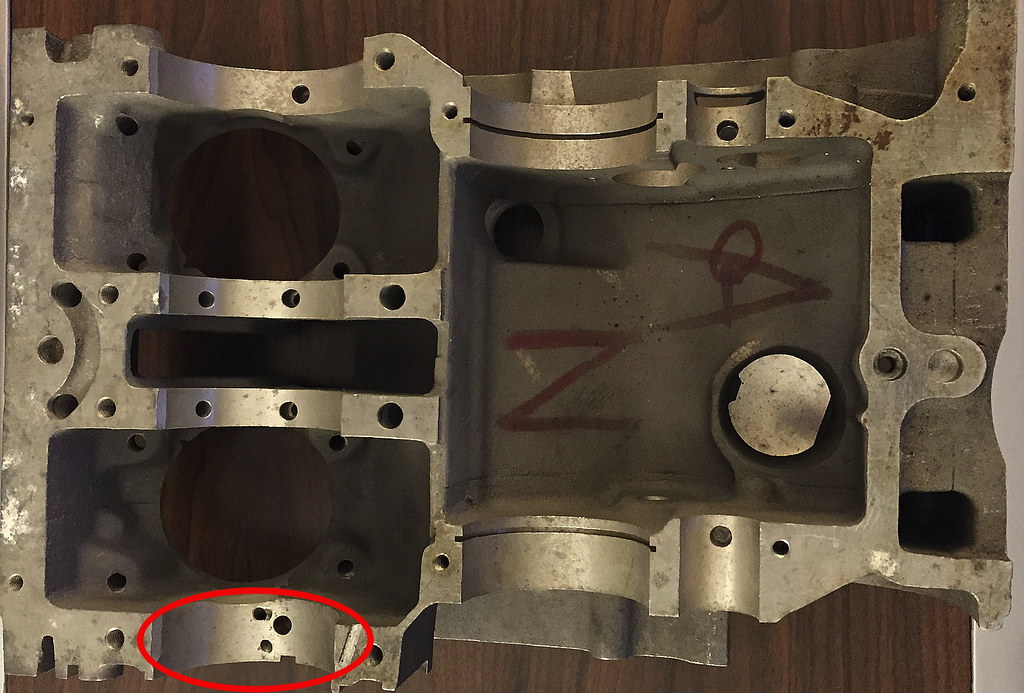 G '60 C77 '60 C72 '62 C72 Dream '63 CL72
'61 CB72 '64 CB77 '65 CB160 '66 Matchless 350 '67 CL77 '67 S90 '77 CB400F I did the same thing with no problems bike runs just great.
http://www.honda305.com/forums/cb72-77- ... 35416.html Just read what the doom buddy's say they were wrong. history detectivesWow, G-Man that's a really nice bit of history. Thank you for the detailed photos. SMBH I'm happy to hear this is not uncharted territory!
Here's hoping the open bearing I ended up with in the engine is ok with the unmodified oil feed. I have not revealed it yet, but the engine is all buttoned up. I'm trying to catch up on posts as I work through the photos. If you really know this engine you'll see from this photo that my original bearing was too wide - there was no room for the oil seal that sits between this bearing and the starter clutch / rotor assembly. I did not discover this until much further down the road! 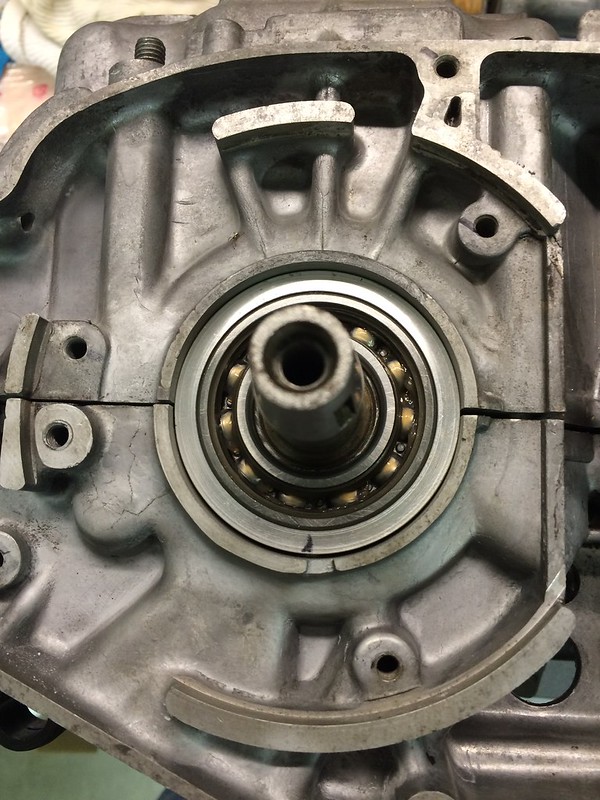 Once I was reasonably satisfied with the bottom end, it was time to sort out the cylinders. I have found this restoration project is a great excuse to buy new tools, including a dedicated toaster oven for the garage. Sounds kinda funny, but it's very liberating to have the freedom of heating up half of a press fit assembly without sneaking around in the kitchen. Later in the project I fulfill my other dream of owning a KTM toaster by putting a logo sticker on this one. 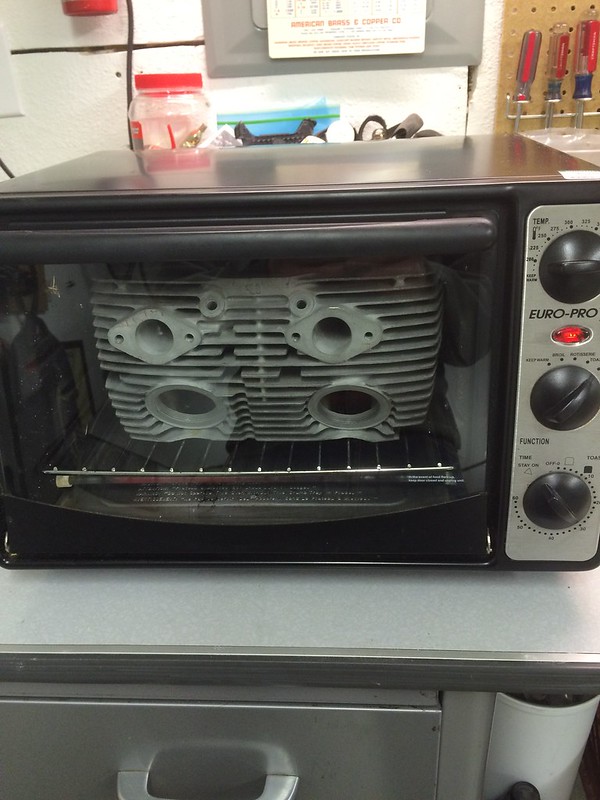 Ten minutes at 450F and the cylinder sleeves dropped right in. They're about .003" (or a sheet of paper's thickness) proud of the casting, per spec.  Re: history detectivesDave
If you have the shield / seal on the crank side of that bearing and have not modified the oil feed, that bearing will run dry. On the ball race cranks (early) the oil is directed to the void between the oil seal and the bearing which creates a reservoir of oil to feed the bearing. If you have taken out the inner shield then the bearing will only be lubricated by spash and the oil will be flung out at high revs. Honda went through a lot of iterations to get to a good solution. Here is how the oil should feed to the early (and replacement for roller) ball race.  Here are some crank bearings with the shield, which goes to the inside.  G
'60 C77 '60 C72 '62 C72 Dream '63 CL72
'61 CB72 '64 CB77 '65 CB160 '66 Matchless 350 '67 CL77 '67 S90 '77 CB400F
| |||||||||||||||||||||||||||||||||||||||||||||||||||||||||||||||||||||


