Page 14 of 18
Posted: Sat Apr 14, 2018 9:56 am
by Seadog
Thank you, G. I’d appreciate the help. I have a very cheap dial indicator that I’ve set up. It's very touchy and I'm not sure it's accurate. Video soon.
G-Man wrote:Hi Seadog
Happy to talk you through the process and provide whatever help I can. First job is to take measurements to see what is out of line.
Posted: Sat Apr 14, 2018 10:24 am
by Seadog
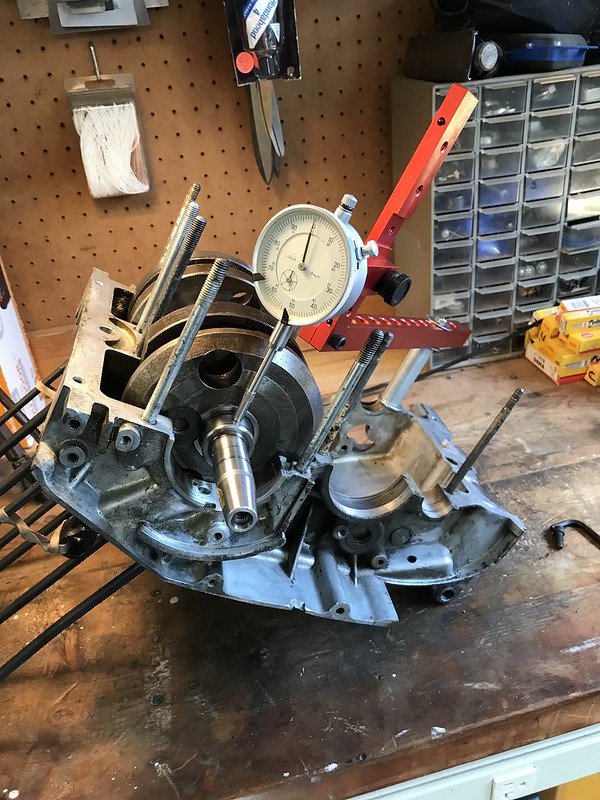
Videos here:
Posted: Sat Apr 14, 2018 10:50 am
by G-Man
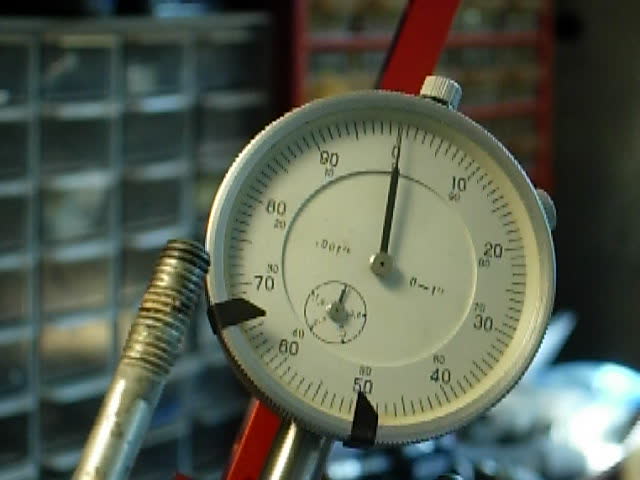
Is that 0.001" per division?
Way too much if it is. You should be down to less than one division.
Using a piece of chalk or crayon, mark the high spot and low spot. Then compare with where the crank pin is. That will tell you which way to whack the flywheel to get it right. I can help you with that. Don't whack anything when it's still in the crankcase..
What is the other end like?
G
Seadog wrote:Videos here:
Posted: Sat Apr 14, 2018 11:59 am
by Seadog
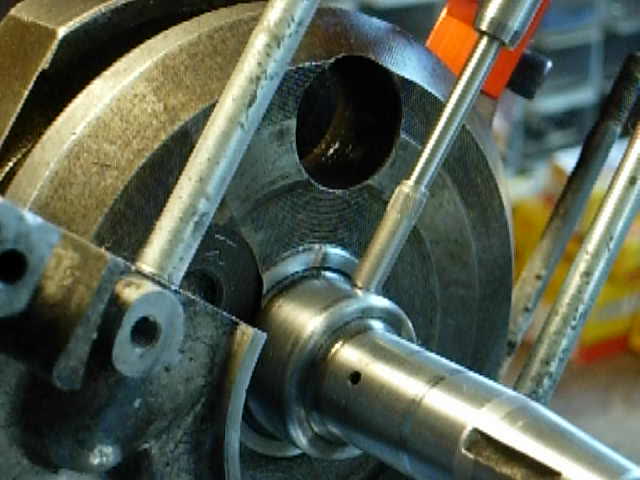
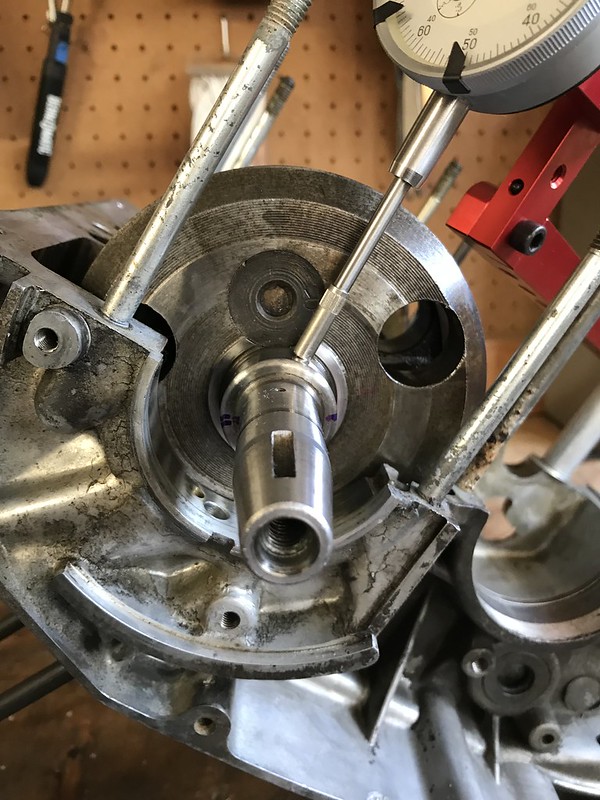
Yes, that's 0.001" per division! That's 0.014+" off. The other side isn't as bad at 0.002" off. I've marked the highs (II) and lows (I). See the photo, below, and the relationship of the marks to the crank pin. Where do I hit it, how hard, with what and how do I brace it? And honestly, if this doesn't work, don't worry about it; it's on me.
G-Man wrote:Is that 0.001" per division?
Way too much if it is. You should be down to less than one division.
Using a piece of chalk or crayon, mark the high spot and low spot. Then compare with where the crank pin is. That will tell you which way to whack the flywheel to get it right. I can help you with that. Don't whack anything when it's still in the crankcase..
What is the other end like?
G
Posted: Sat Apr 14, 2018 1:27 pm
by G-Man
Perfect result for understanding what is happening.
OK - here we go. Cradle the crank in your arm with some cloth (an old sweater or coat is fine) around it to dampen any 'ringing'. Leave the 'wonky end' exposed, but support the rest.
With a copper mallet (not a steel hammer), strike the perifery of the flywheel hard, once, next to the high spot. You're trying to move the flywheel around the crankpin so that the shaft runs concentrically.
Next - put it back in your measuring setup and check what happened. If the 'runout' didn't change, you didn't hit hard enough. If the 'hi' has reduced you have moved it and need to use how much it moved to judge how hard to hit it next time.
If the hi has become the low, you hit it too hard....
Be prepared to go 'too far' and need to hit it back the other way.
I can guarantee that when you've got it within 1 thou, you will have a grin from ear to ear...... :-)
Feel free to ask questions. In a PM if that is easier.
Good luck!
G
Seadog wrote:Yes, that's 0.001" per division! That's 0.014+" off. The other side isn't as bad at 0.002" off. I've marked the highs (II) and lows (I). See the photo, below, and the relationship of the marks to the crank pin. Where do I hit it, how hard, with what and how do I brace it? And honestly, if this doesn't work, don't worry about it; it's on me.
G-Man wrote:Is that 0.001" per division?
Way too much if it is. You should be down to less than one division.
Using a piece of chalk or crayon, mark the high spot and low spot. Then compare with where the crank pin is. That will tell you which way to whack the flywheel to get it right. I can help you with that. Don't whack anything when it's still in the crankcase..
What is the other end like?
G
Posted: Sat Apr 14, 2018 1:32 pm
by G-Man
Seadog
When you have completed this operation you'll realise that this lump of metal is just like a big wobbly piece of jello. When you're hitting it to free pistons or to get the sporocket nut undone you'll appreciate what might might happening.... :-)
G
Posted: Sat Apr 14, 2018 3:53 pm
by Seadog
Thanks, G. I think I understand. The flywheel is simply cocked on the crank pin and by striking the high outer edge, I'm trying to level it. Okay. I'll try to find a copper mallet and given it a go.
G-Man wrote:Perfect result for understanding what is happening.
OK - here we go. Cradle the crank in your arm with some cloth (an old sweater or coat is fine) around it to dampen any 'ringing'. Leave the 'wonky end' exposed, but support the rest.
With a copper mallet (not a steel hammer), strike the perifery of the flywheel hard, once, next to the high spot. You're trying to move the flywheel around the crankpin so that the shaft runs concentrically.
Next - put it back in your measuring setup and check what happened. If the 'runout' didn't change, you didn't hit hard enough. If the 'hi' has reduced you have moved it and need to use how much it moved to judge how hard to hit it next time.
If the hi has become the low, you hit it too hard....
Be prepared to go 'too far' and need to hit it back the other way.
I can guarantee that when you've got it within 1 thou, you will have a grin from ear to ear...... :-)
Feel free to ask questions. In a PM if that is easier.
Good luck!
G