honda305 Home honda305 Auctions honda305 Gallery honda305 Forum


honda305.com Forum

Login
□ Search
□ FAQ 
□ 
Vintage Honda Owners,
Restorers, Riders and
Admirers

The Neverending Tale of a '65 Superhawk Restoration

Want to keep a Restoration Log? Post it here! You can include photos. Suggested format: One Restoration per Thread; then keep adding your updates to the same thread...
User avatar
cfloren
honda305.com Member
Posts: 52
Joined: Fri Jan 05, 2007 2:21 am
Location: Torrance, CA

Post by cfloren » Wed Sep 16, 2009 1:00 pm

milwaukeephil wrote:You leaving us hanging here?
Haha...yes, sorry to leave you guys hanging. I am not the quickest with a PC so it takes me a while to complete each post. I'm also a picky writer so I end up going back and changing my text a lot.

I will get back to the story, hopefully tonight. I need to catch up to what I'm doing now so people can actually see that I'm making progress.

-Chris

User avatar
cfloren
honda305.com Member
Posts: 52
Joined: Fri Jan 05, 2007 2:21 am
Location: Torrance, CA

Post by cfloren » Wed Sep 16, 2009 10:08 pm

Engine teardown was next, which to me was the most interesting part of the whole disassembly. I always like to try and get inside the engine designer's head when tearing one down, to see if I can guess what they were thinking. There are countless ways to design something to serve a particular purpose, but eventually the engineer has to choose one based on the compromises at hand. My own training as an engineer helps me shed some light on why machines are the way they are.

I also enjoy seeing an engine tell its story; what evils have been done to it, what kinds of owners it has had over the years, and whether it's happy or not. Mine appeared fairly content on the outside, but inside it had a more unpleasant story to tell. The usual gearbox parts were worn (14mm bronze bushing, kick spindle bushing, shift drum, pins etc). A lot of the fasteners looked like a pair of gorillas had attacked them in the past, trying to take things apart or put them back together. Or just break them, for that matter. Judging by the plier tooth marks, stripped threads, mangled cases and rounded heads I can only conclude that my particular engine was used as a primate training engine and was owned by the local zoo.

Selected fine images for your enjoyment:


Pistons were very clean but showed normal wear on skirts.

Image


This was the worst of the gouges in the cylinder bores.

Image


Cams and rockers appeared OK to me; I learned later that they were not so nice and got a new set.

Image


I had always had trouble getting the ignition timing set properly. I found out why when I looked at the advance mechanism...someone had brazed the arms in the full-advance position. This was one of those "Ah-ha! I'm not crazy" moments.

Image


Gorilla attack! Take a look at the primary drive locknut and tab washer:

Image


Crank, rods, and gears were all fine on first inspection. Bushings were worn leading to a lot of gear wobble.

Image


For a 41-year old engine (at the time) I thought I'd find more guk and bits in the crankcase than this:

Image


And here's my attempt at photography. There was something appealing about the bare bearing journals (no pun intended).

Image
Last edited by cfloren on Mon Nov 26, 2018 4:45 pm, edited 1 time in total.

User avatar
cfloren
honda305.com Member
Posts: 52
Joined: Fri Jan 05, 2007 2:21 am
Location: Torrance, CA

Post by cfloren » Wed Sep 16, 2009 11:12 pm

Time to rebuild the transmission:

Image


I took a whole lot of notes and pictures, and made a bunch of sketches during this phase. I even drew out a diagram of how the power "flows" or transfers through the various gears, dogs and shafts, to convince my roommate (and myself) that I did know how this thing worked. Here they are in a 3-part miniseries, for those who are interested:

Image

Image

Image
Last edited by cfloren on Mon Nov 26, 2018 4:45 pm, edited 2 times in total.

User avatar
cfloren
honda305.com Member
Posts: 52
Joined: Fri Jan 05, 2007 2:21 am
Location: Torrance, CA

Post by cfloren » Wed Sep 16, 2009 11:19 pm

Here are some shots of the trans bushings I replaced with NOS parts. They were worn far beyond usable limits and were the major sources of gear wobble and misalignment.

14mm bronze bushing, part no. 23933-253-000

Image


Kick spindle bushing, on the ratchet end of the kick spindle (lay)shaft, part no. 28258-259-010

Image
Last edited by cfloren on Mon Nov 26, 2018 4:46 pm, edited 1 time in total.

User avatar
cfloren
honda305.com Member
Posts: 52
Joined: Fri Jan 05, 2007 2:21 am
Location: Torrance, CA

Post by cfloren » Wed Sep 16, 2009 11:36 pm

The transmission rebuild went smoothly at first. I replaced the bushings above, along with the shift guide pins and rollers, kickstarter pawl, spring and pin all with NOS parts. The shift forks and drum were replaced with used units that were only very slightly worn.

Only after I got it all together and back in the cases did I run into a problem. The whole transmission would tighten up and almost get stuck once per revolution as I rotated the input shaft by hand. Gear shifting worked beautifully, and this problem had me stumped for several weeks.

See my post here: http://www.honda305.com/forums/viewtopic.php?t=1414

The culprits turned out to be a bent mainshaft and a bent kick spindle shaft (aka lay or counter shaft). I discovered that they were bent by first stripping all the gears and bushings off of each, then installing the bushings / bearings back on the ends and placing them in the top case half. I could see the bend in both shafts as I rotated them through one full revolution. I measured runout (severity of the bend) with a dial indicator to verify what my eyes were telling me. NOS shafts saved the day in this case.

Sorry, I didn't remember to take any pictures of this whole ordeal...
Last edited by cfloren on Mon Nov 26, 2018 4:47 pm, edited 1 time in total.

User avatar
cfloren
honda305.com Member
Posts: 52
Joined: Fri Jan 05, 2007 2:21 am
Location: Torrance, CA

Post by cfloren » Thu Sep 17, 2009 12:49 am

I stand corrected. I did take the following shots of the NOS mainshaft (ooooh...shiny):

Image


Image


Image

How often do you get to unwrap a brand new 40-year-old part?

Me, not so often.

User avatar
cfloren
honda305.com Member
Posts: 52
Joined: Fri Jan 05, 2007 2:21 am
Location: Torrance, CA

Post by cfloren » Tue Sep 29, 2009 9:34 pm

Next order of business was carb rebuilds. The original square-bowl carbs that were on the bike when I bought it had seen better days. Back when I first got it running, I had spent quite a while cleaning out aluminum oxide stalagmites and stalactites from the left carb bowl. Apparently a fair amount of moisture had gotten in and done its thing over time.


This is was my first attempt at cleaning (from years earlier):

Image


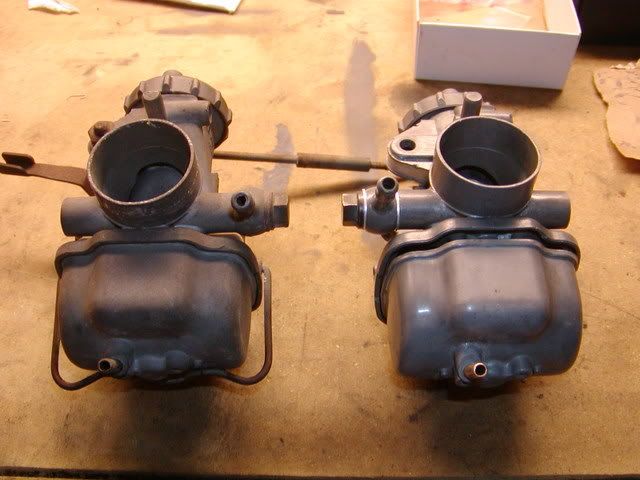
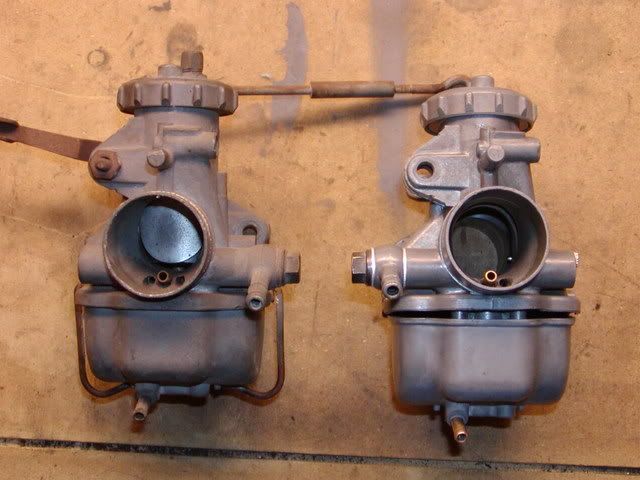
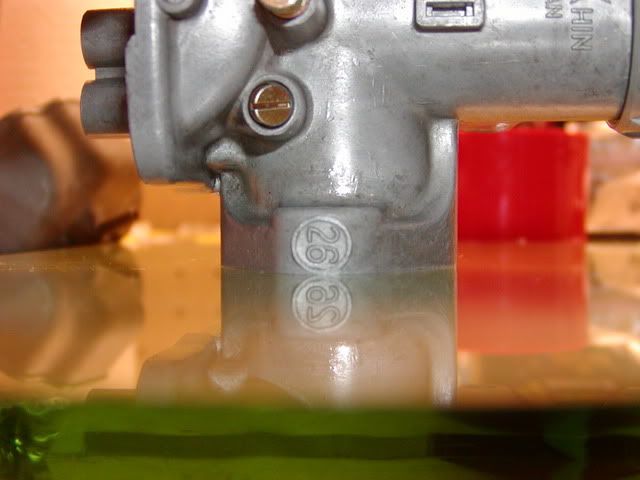
The "new" engine (which is from '64, one year earlier than the frame) came with the round-bowl carbs installed when I bought it. I don't think these are correct for a '64, and I know they aren't correct for a '65, but I'm not building a showroom-stock 100% correct motorcycle. The round-bowl carbs were in much better shape but nonetheless did need some attention. I cleaned them carefully with various brass wire brushes to remove the surface oxidation. I wasn't going for a polished or shiny finish, just something that looked serviceable and relatively new again. Here are the results of my efforts: untouched carb on left, cleaned on right.


Image


Image


Image


I bought the Keyster kits and ended up using the gaskets, o-rings and air screws with new screw springs. I kept the original jet holders but haven't decided on mains yet. I know Kei-Hin (OE) jets are allegedly far superior to the Keysters, just need to decide on a size once the bike is running. I used new Honda needle valves and brand new Honda brass floats. The bowl bail clips and choke mechanism parts will all go out for new zinc plating.

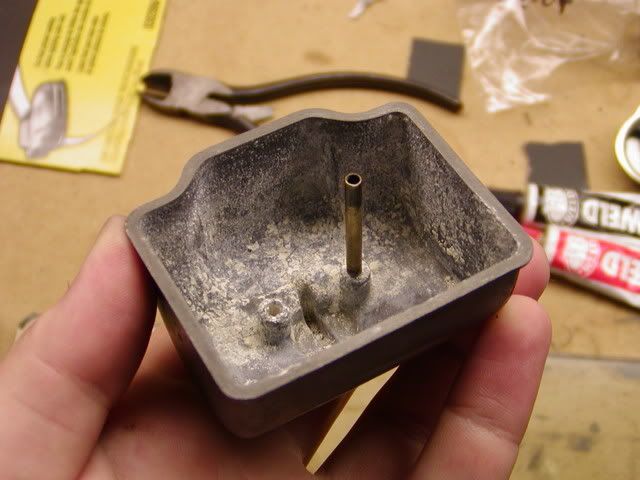
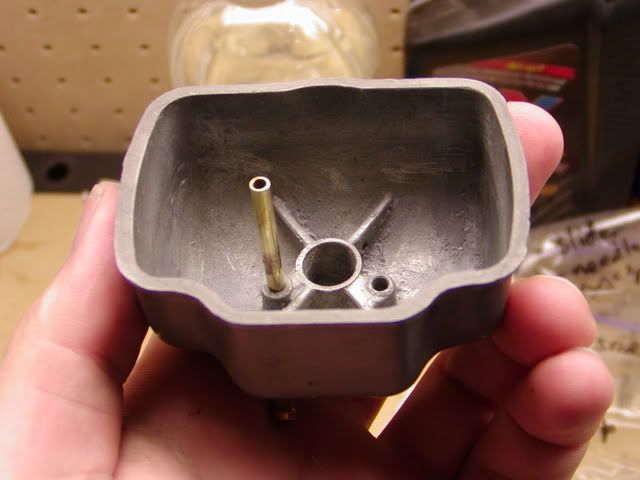
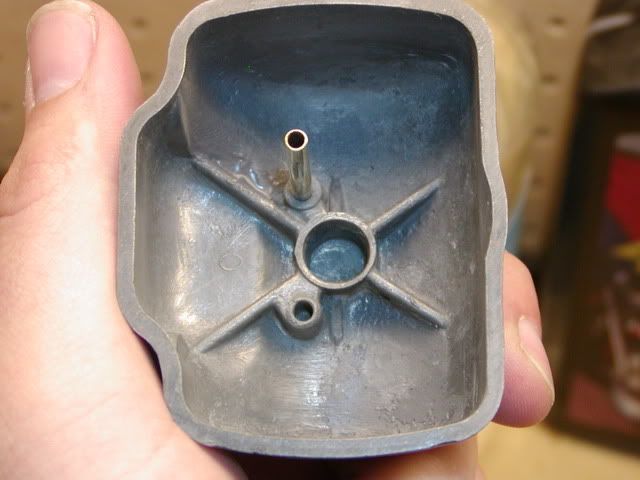
The bowls did have a bit of pitting and oxidation, and after cleaning them up I was left with some pinholes that were a bit troubling. Knowing that JB-weld is insoluble in gasoline, and that no one would ever see it, I mixed up a small batch and filled in the voids.


It's more or less visible in the following images:

Image

Image


My last major hurdle was getting the flanges flat. I know that over-tightening the flange nuts will warp the flanges, which can lead to "sticky" slides. I decided to correct any warping that had previously occurred, and flatten the flanges to better-than-stock specs. So I bought a small square of glass and decided to lap them.


Before pictures from one carb:

Image

Image

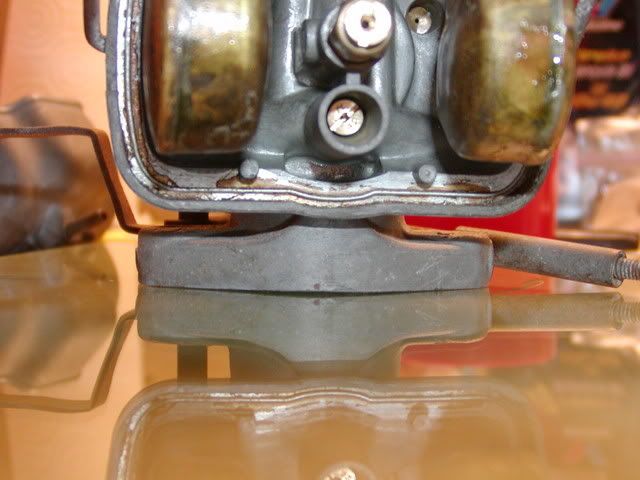
I checked them for warping in two planes, as shown by the two different angles of the pictures. I could get a feeler gauge between the carb and the glass, somewhere around 0.010" if I recall correctly. Lapping to correct this was a long, laborious process. I used 600 and then 800 grit sandpaper, with WD-40 as a lubricant. The glass was clamped to the bench and I used a combination of linear back-and-forth movements with circular sanding to keep things even.


Results:

Image

Image

Huge improvements as you can see. Now I know I'll never over-tighten the flange nuts...;-)
So the flanges should remain flat and true for as long as I own the bike.
I also lapped the phenolic spacers, which together with the lapped carbs should prevent any intake air leaks.

Overkill? You tell me. I had fun with it.
Last edited by cfloren on Mon Nov 26, 2018 4:48 pm, edited 1 time in total.

Post Reply


CB-77 | CYP-77 | Road Test | Riding Log | Literature | Zen | Marketplace | VJ Survey | Links | Home