Hi All,
I thought I would start a restoration thread for my CL77 project. As an introduction, last winter I did a light work over of my late brothers 1966 CB77. The CB was crashed into a swamp in the late 70s. I still remember to this day, as a little guy, squatting on the dirt floor of our basement and watching him clean the mud out of the top end and put the bike back together. It never ran to my brother’s satisfaction again after the crash. With the help of the information on the forum I was able to get it back together just in time for the 4th annual memorial ride (in honor of my late brother who was the original owner, and his wife). The CB made all 100 miles last May under one of my other brothers (and current owner) and is still ridden a couple times a week without so much as a dead battery. I have no idea if it runs to my late brother’s satisfaction yet but it does to mine. Below are a couple of before and after pictures. It’s not perfect but it is mostly complete with most of the right stuff on it now.
Now it’s time to get my CL started (frame# CL77 1059081 with engine CL77E 1058448). It is another bike out of my late brother’s estate. It’s a project he started but didn’t get to finish. He got as far as getting the frame blasted and painted and the front end on it. The rest is in boxes as you will see in the pictures that follow. I have the hard to find stuff like the chrome fenders (new front and a nice rear), front fender brace (new chrome), nice exhaust, as well as the correct chain guard. I am in the process of sorting hardware and preparing it for plating at the moment.
Here is my first couple of questions on the CL. I ran across 2 kick start assemblies. One he had purposely saved in the same box as the new fender brace and is shown in the picture below on the left. The other is assembled to a cover which I think is correct for the CL. I keep thinking that the one on the left must belong to the bike since he went to the trouble of putting it in the box with the brace but he just might have been screwing with me in advance. Can any of you confirm for me which is the correct assembly? I have a parts manual but it only goes up to 1966 and I don’t know if there were changes to this assembly that are not covered in the manual I have.
Next question, I believe that the right and left air cleaner stays are supposed to be plated. He had them very nicely painted and before I go stripping them I would like to know for sure if they are supposed to be plated. Same question for the side stand. It's nicely painted but I think it is supposed to be plated.
Thanks for the continued help,
Rich


honda305.com Forum
Vintage Honda Owners, Restorers, Riders and Admirers
CL77 project, Starting from boxes.
CL77 project, Starting from boxes.
- Attachments
-
- Which one is correct?
-
- Rest of the parts.
-
- Rolling chasis
-
- CB77 after
-
- Here is the CB before getting started.

Hello,
I have been making a little progress on the bike. After much research and a fist full or two of cash I am nearly there. I have some final paint on the tank and side covers and a seat to sort out. I had the bike running in the spring but only on one cylinder which I have since tracked down to a plugged jet. I think the engine should be good to go but haven’t fired it since cleaning the jet.
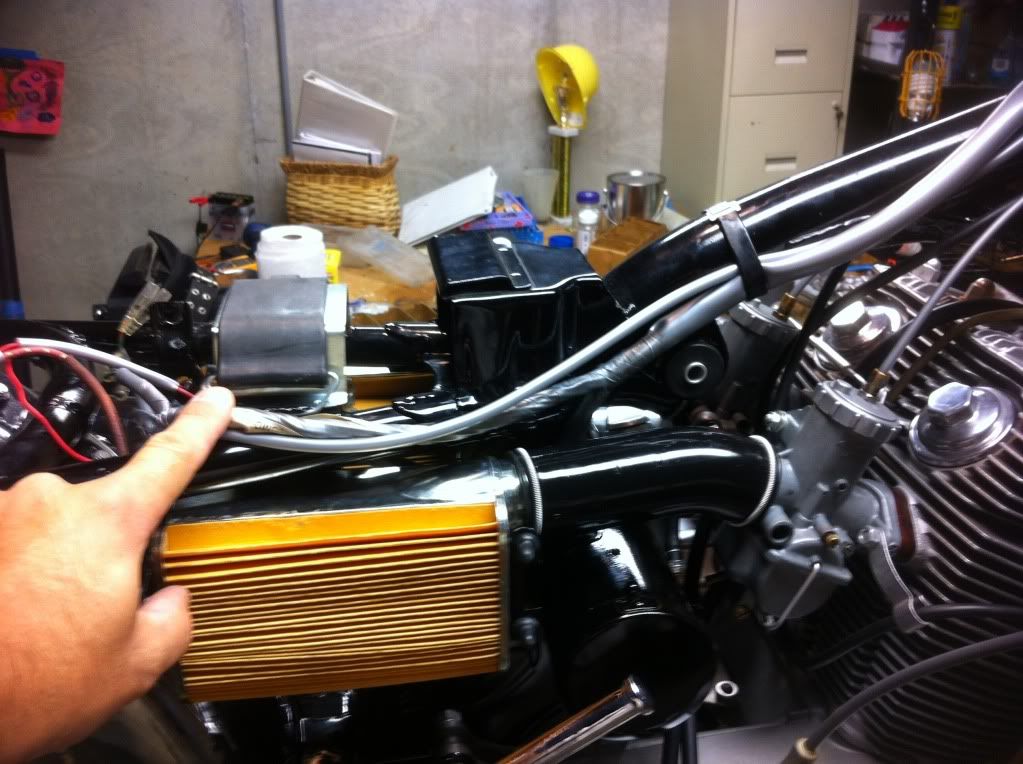
Currently I am struggling with the correct routing of the clutch and carb cables. Can someone help me get them right? I think the clutch should be routed as shown in the pic in the following link but the carb cable seems wrong:
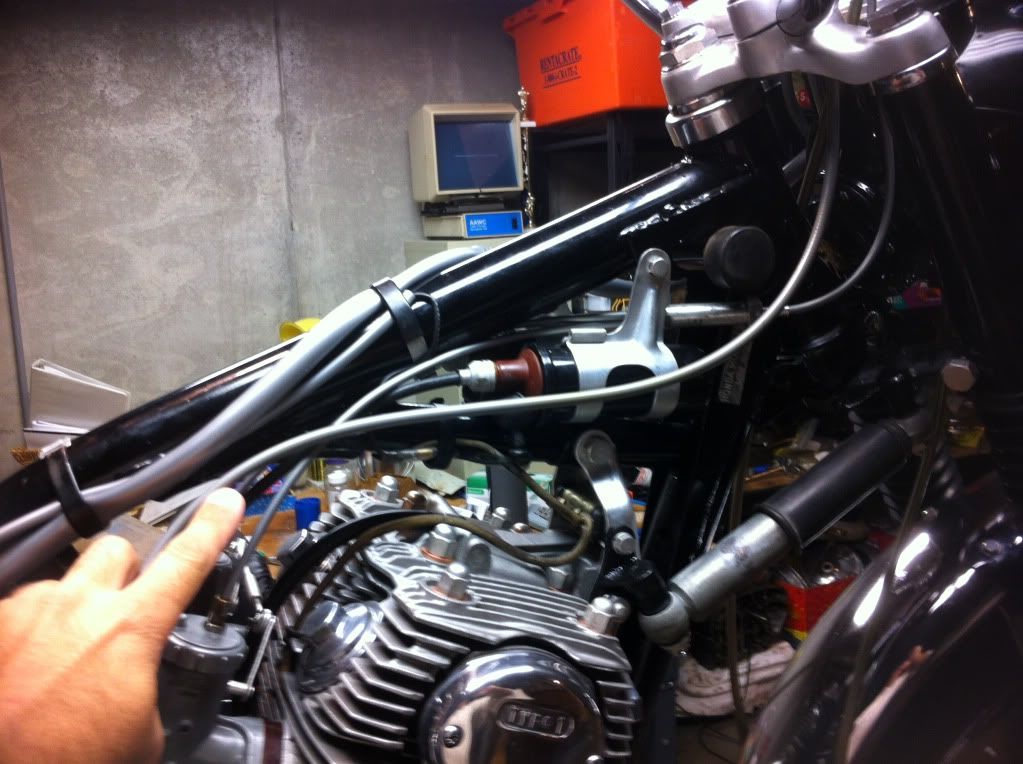
Should the splitter for the carb be to the outside of the right hand coil with the cable for the left carb passing underneath the frame?
Also, I am open to critiques on the correctness of the bike based on what you see in the following photos:
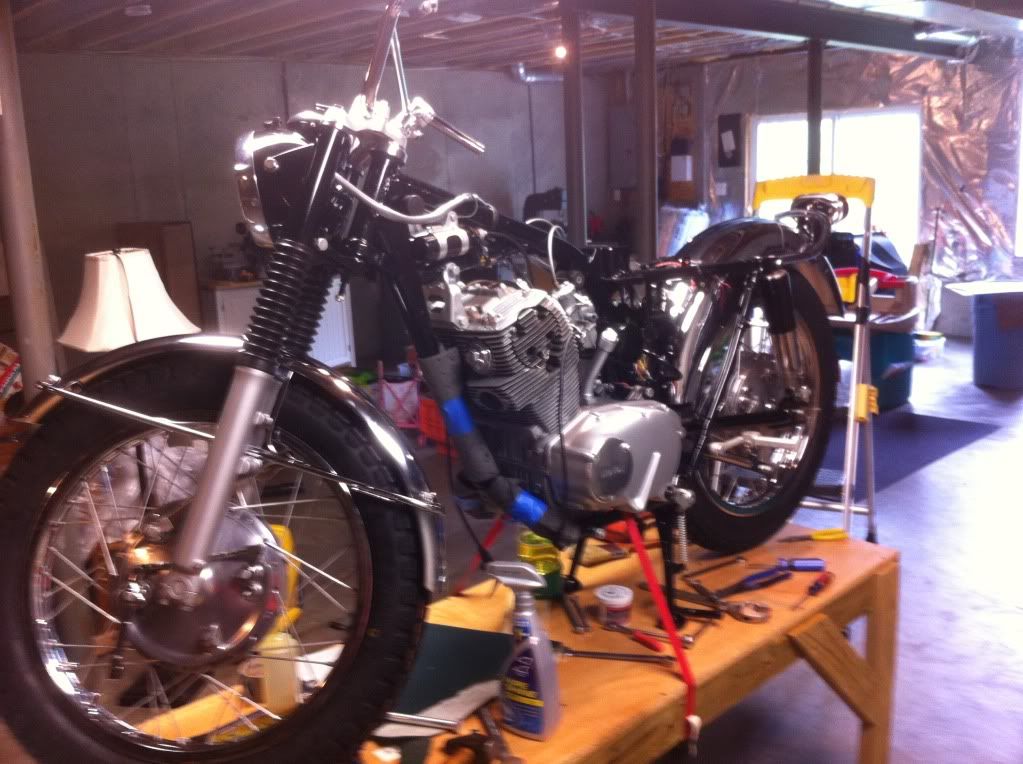
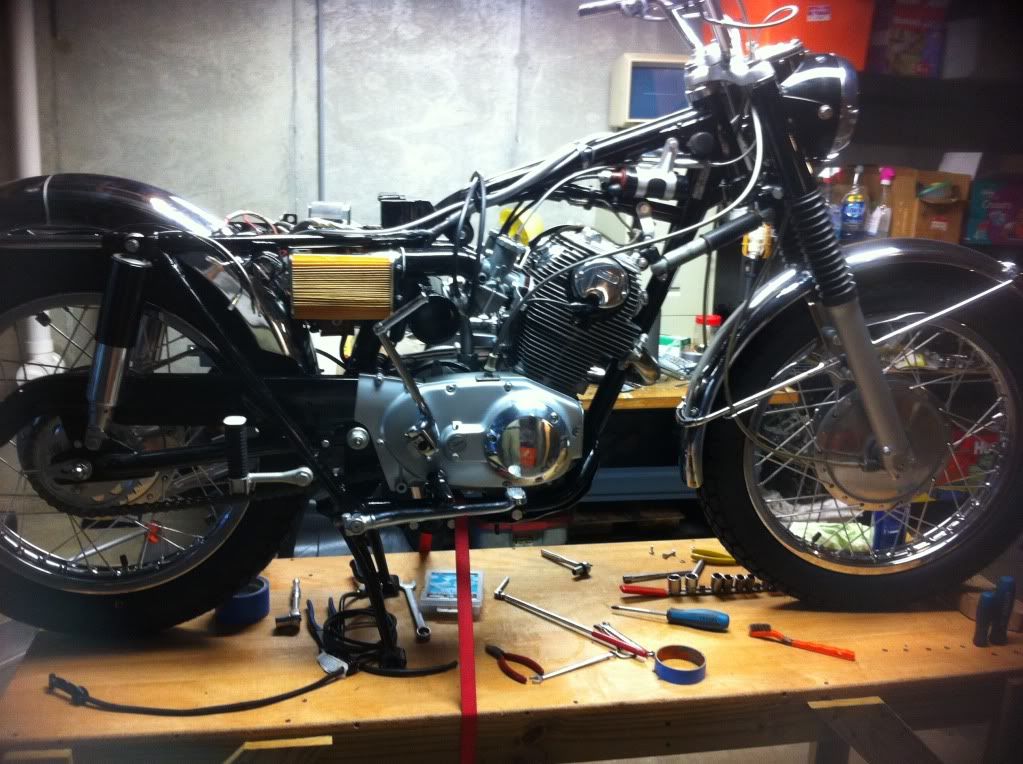
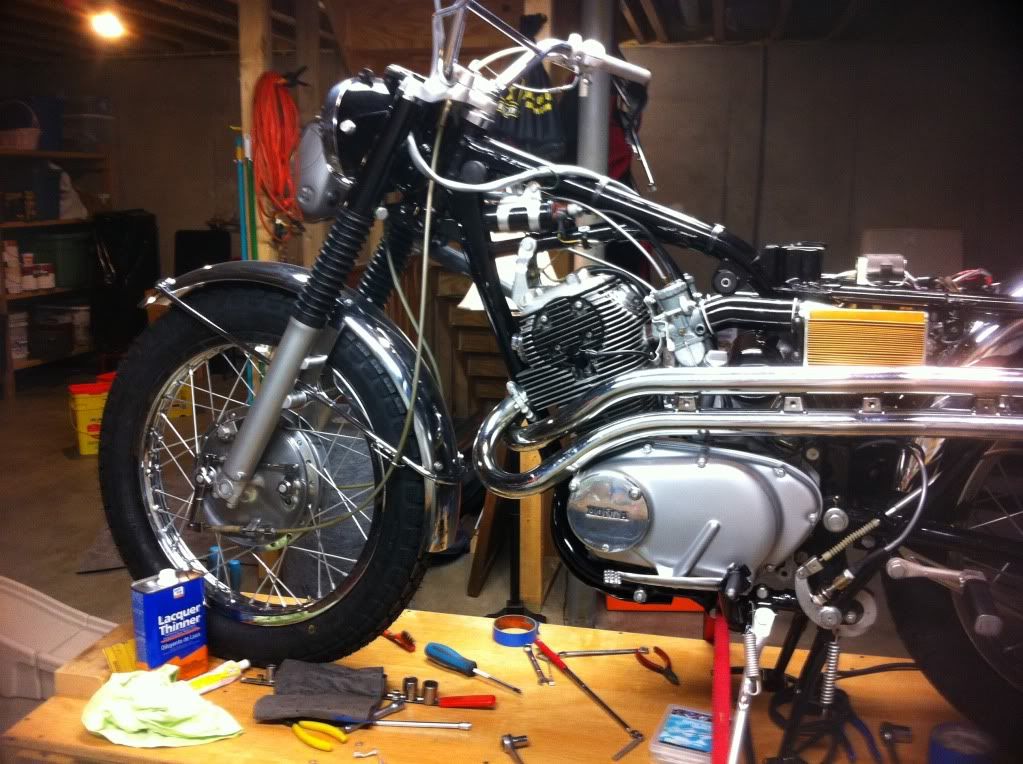
I know I have a early brake cable, and a few parts here and there are cad plated rather than chrome (due to cost) but I am hoping I got it mostly right.
Thanks,
Rich
I have been making a little progress on the bike. After much research and a fist full or two of cash I am nearly there. I have some final paint on the tank and side covers and a seat to sort out. I had the bike running in the spring but only on one cylinder which I have since tracked down to a plugged jet. I think the engine should be good to go but haven’t fired it since cleaning the jet.
Currently I am struggling with the correct routing of the clutch and carb cables. Can someone help me get them right? I think the clutch should be routed as shown in the pic in the following link but the carb cable seems wrong:
Should the splitter for the carb be to the outside of the right hand coil with the cable for the left carb passing underneath the frame?
Also, I am open to critiques on the correctness of the bike based on what you see in the following photos:
I know I have a early brake cable, and a few parts here and there are cad plated rather than chrome (due to cost) but I am hoping I got it mostly right.
Thanks,
Rich
Last edited by rpr851r on Thu Oct 18, 2012 8:06 am, edited 1 time in total.

Wow, 2 years between posts on a resto thread. Now that's a laid back man.
Bike looks great so far. Probably better than when it was new.
I own a '67 CLL77 and might be able to help you with details. I can tell you that there is not much room for the junction box for the carb cables. I'd have to pull my tank to be sure, but your cables look fine at first glance. There is not a lot of room for all the stuff they put under that tank. So, the goal is to prevent pinching and binding.
May I suggest you use a different method to post pics. If you choose the link that starts IMG and ends in IMG, it should post the picture in your message and not require folks to click the link.
I'll try to remember to check the routing of my clutch cable tomorrow and post the routing here.
regards,
Rob
Hi Rob,
It’s only been 2 years because its felt like much longer. I have been lurking, reading and asking a few questions here and there chipping away at this thing. Starting with boxes was a big challenge and then I got bit by the “make it correct as possible bug” which really can drag things out. For example I have a perfectly nice seat that I put together. I welded up the few cracks in the pan, welded up the mounting holes to make them nearly round again, painted the pan, and had an upholstery shop make new foam and install the aftermarket cover on it. I got it back and just don’t like it so I bought another seat with a good cover and foam but the piping is black and not silver so now what? My plan is to get the upholstery shop to replace the black piping with the silver and reinstall the cover once I get the pan squared away again. That kind of behavior probably has medical diagnosis. I also tend to work on it when the nights get long.
Thanks for the tip on posting pictures. I went back and fixed the original post.
Rich
